Call it OCD if you will, but I make it a priority to have a clean Notification panel. Like a chalkboard that isn't wiped spotless, I get an unsettling feeling that something in the universe isn't complete when there's unnecessary clutter in the drop-down. For this reason, I loathe the fact that I can't remove the "Wi-Fi connected" tile from my "Notifications."
Luckily, there are two simple ways to remove this irritating, unnecessary notification. One is a quick non-permanent settings change that works across all Android devices, and the other a more fixed solution to annoying persistent notifications on Samsung Galaxy devices.
Option #1: Force Stop It (Any Galaxy)
This first method applies pretty much across the board on Android. While I'll be showing it out on the Galaxy S4, the "Force stop" option is there for any Android.
Pull down from your Status bar to access the Notification panel, tap and hold on the "Wi-Fi connected" notification, then select "App info" when it pops up. Once in the App info screen, select "Force stop."
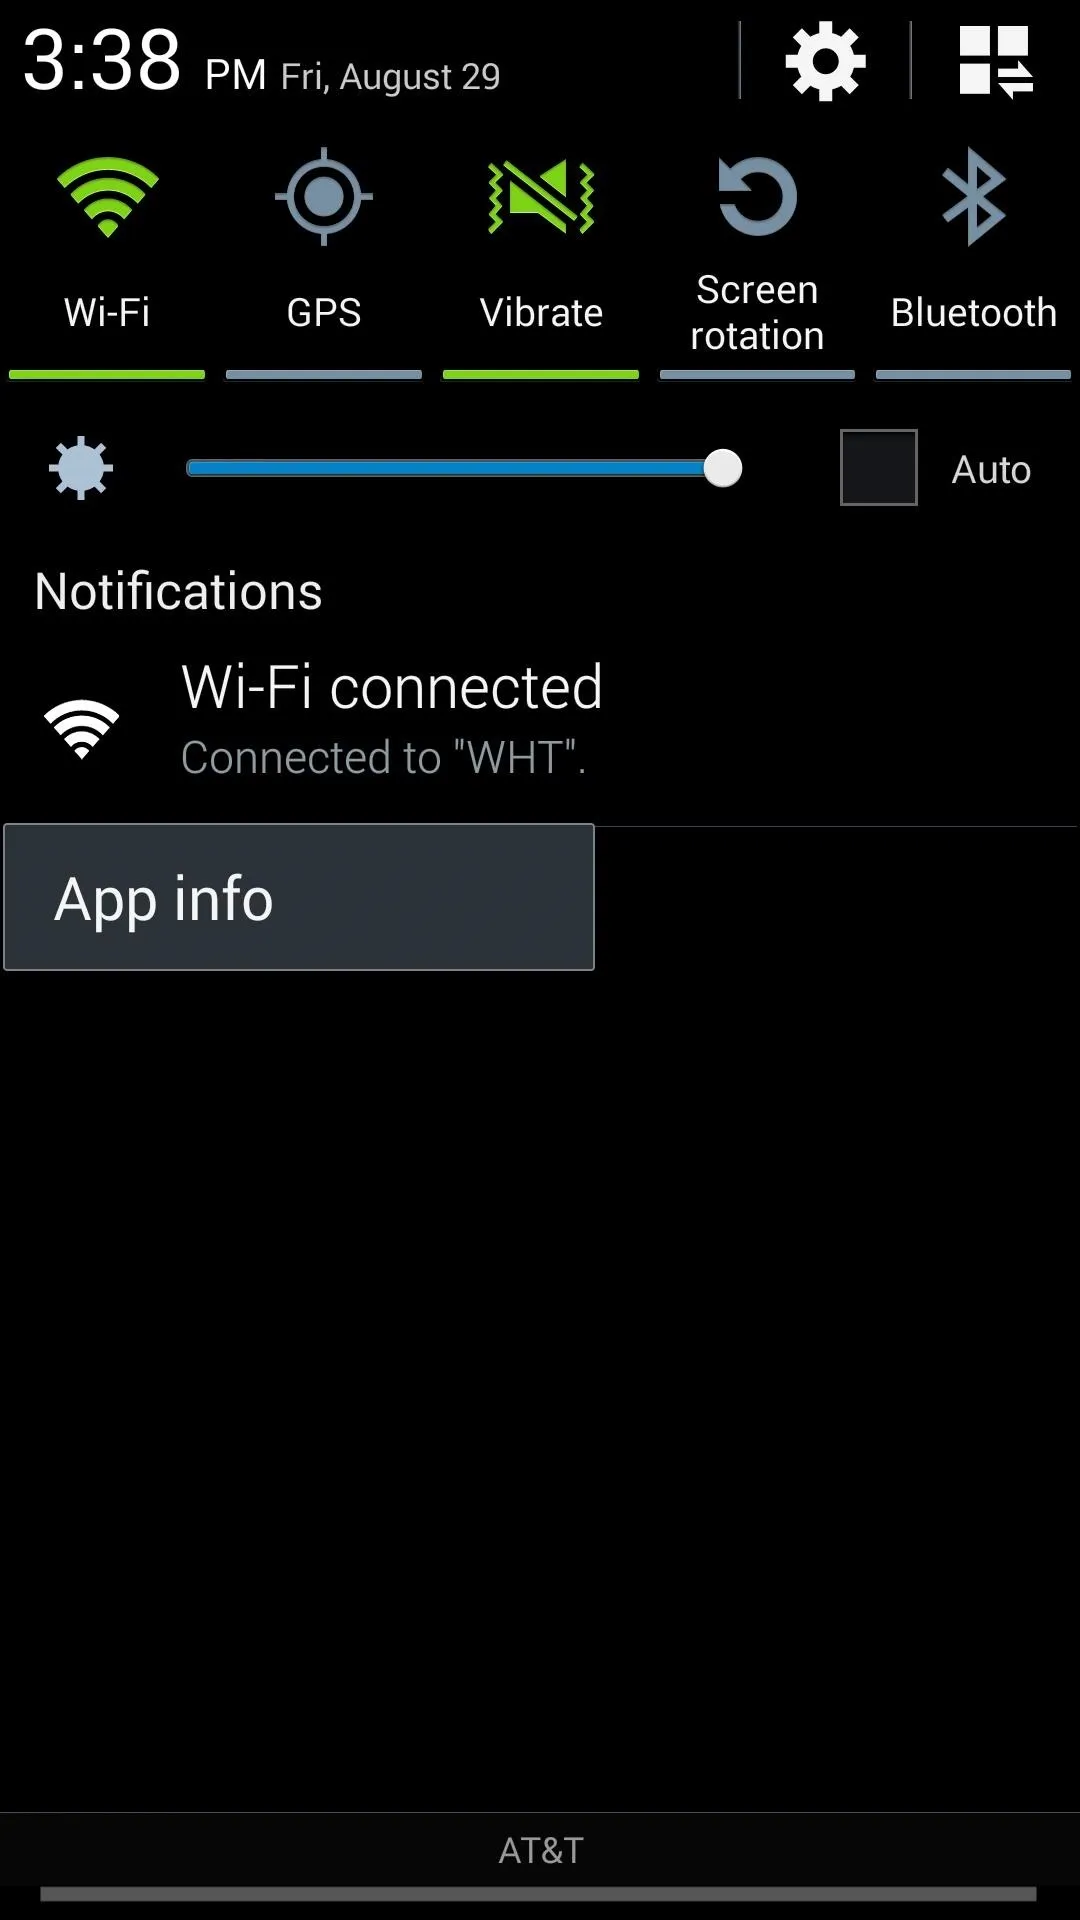
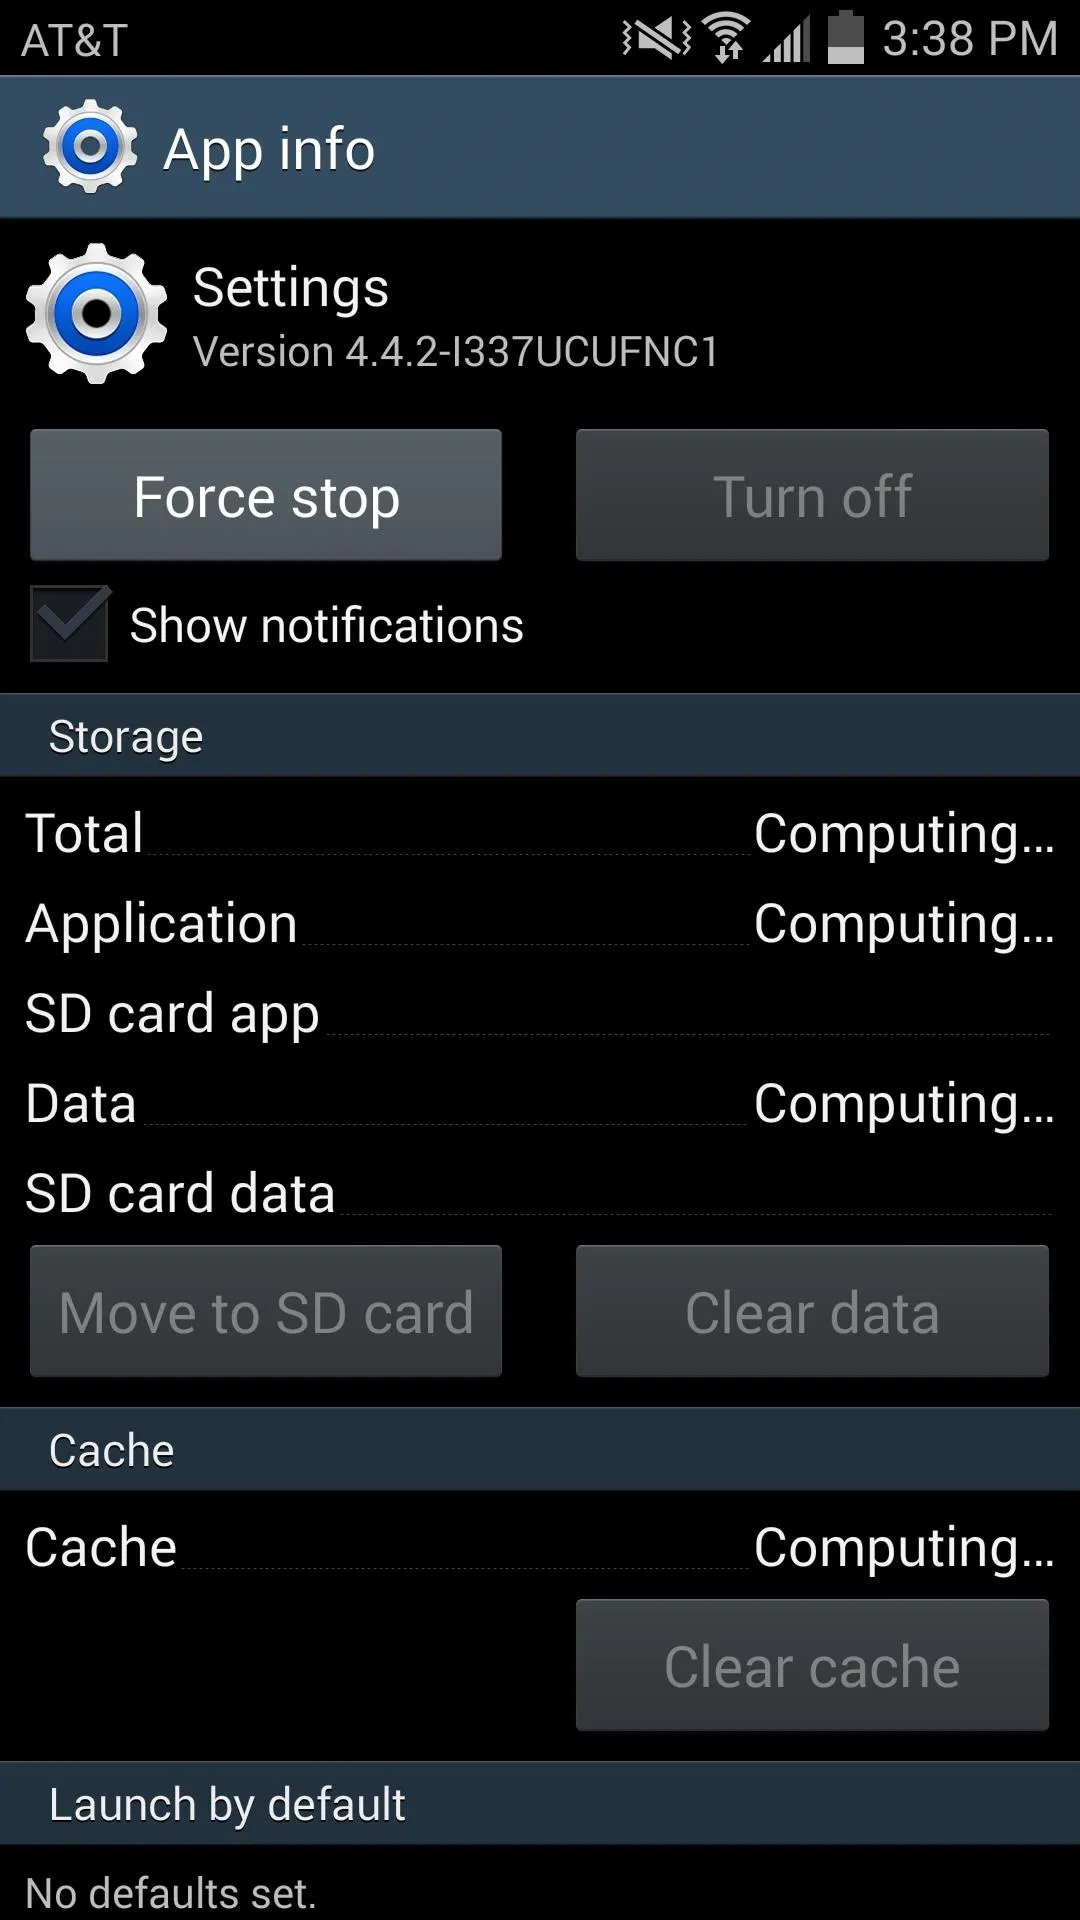


Confirm and go check your Notification tray; you'll see that the obnoxious notification will now be gone.
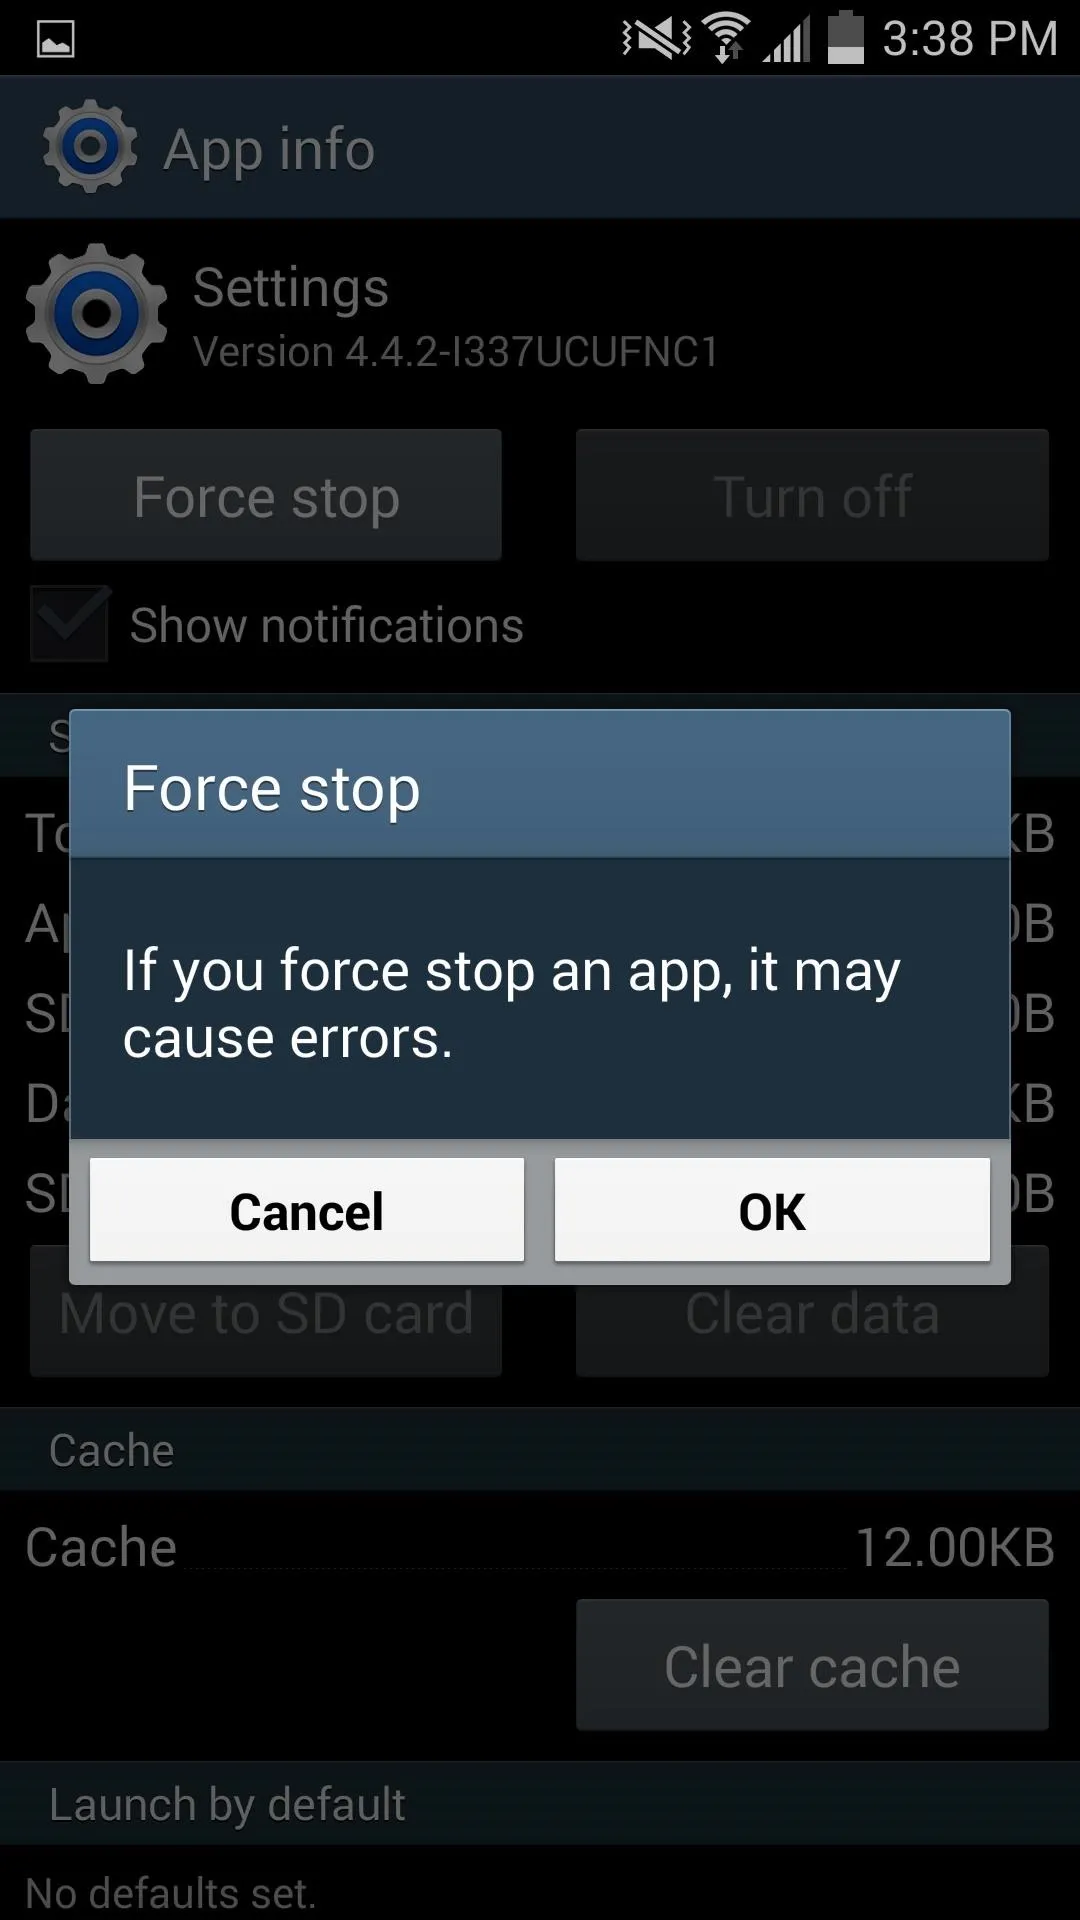



Force stopping will not disable your Wi-Fi, but unfortunately, the notification will come back upon rebooting or when toggling your Wi-Fi off and on. But no worries, check the next section to see how to take full control of your notifications.
Option #2: Take Control of Your Notifications (Any Android)
With a rooted Galaxy device and the Xposed Framework installed, you'll be able to prevent notifications, including the persistent Wi-Fi one, from annoying you ever again.
Essentially, NotifyClean grants you the power to pick and choose which notifications you will receive, so definitely check it out.
There you have it, two simple solutions to an annoying "feature" on your Galaxy device. Did these help? Let us know in the comments below or on our Facebook and Twitter feeds.



Comments
No Comments Exist
Be the first, drop a comment!