Theming and modding are a big part of the softModder community, but there are endless ways to customize our Android devices. Which ones should you download? Which ones should you avoid? It's extremely frustrating to find them all—and pick and choose.
Now, thanks to developers Nottach and rovo89, we now have a one-stop shop option on the Samsung Galaxy S4—Nottach Xposed!
Based on the modified framework developed by rovo89, Nottach was able to make Xposed, which eliminates the need to gather various files and flash them individually. Think of this as a directory of GS4 mods available at the tip of your fingers—without the need of searching for any individual files.
What You'll Need
One thing to remember is that this mod was created specifically for the AT&T version of the Samsung Galaxy S4. I've personally tested it on a Sprint variant, and it should work just fine for all other variants, but heed this warning: This is ONLY supported for the AT&T variant.
- Stock, rooted Touch Wiz ROM.
- A current Nandroid backup.
- Rovo89's modified framework.
- Nottach's Xposed mod. Click here to download the latest version.
Installation
Once we install a couple of things, we'll be off and modding in no time, and then I'll show you some of my favorite mods that I've used on my GS4.
Step 1: Install the Xposed Installer
The first thing we'll need to do is install the apk of the modified framework. Install like any other app and open it.
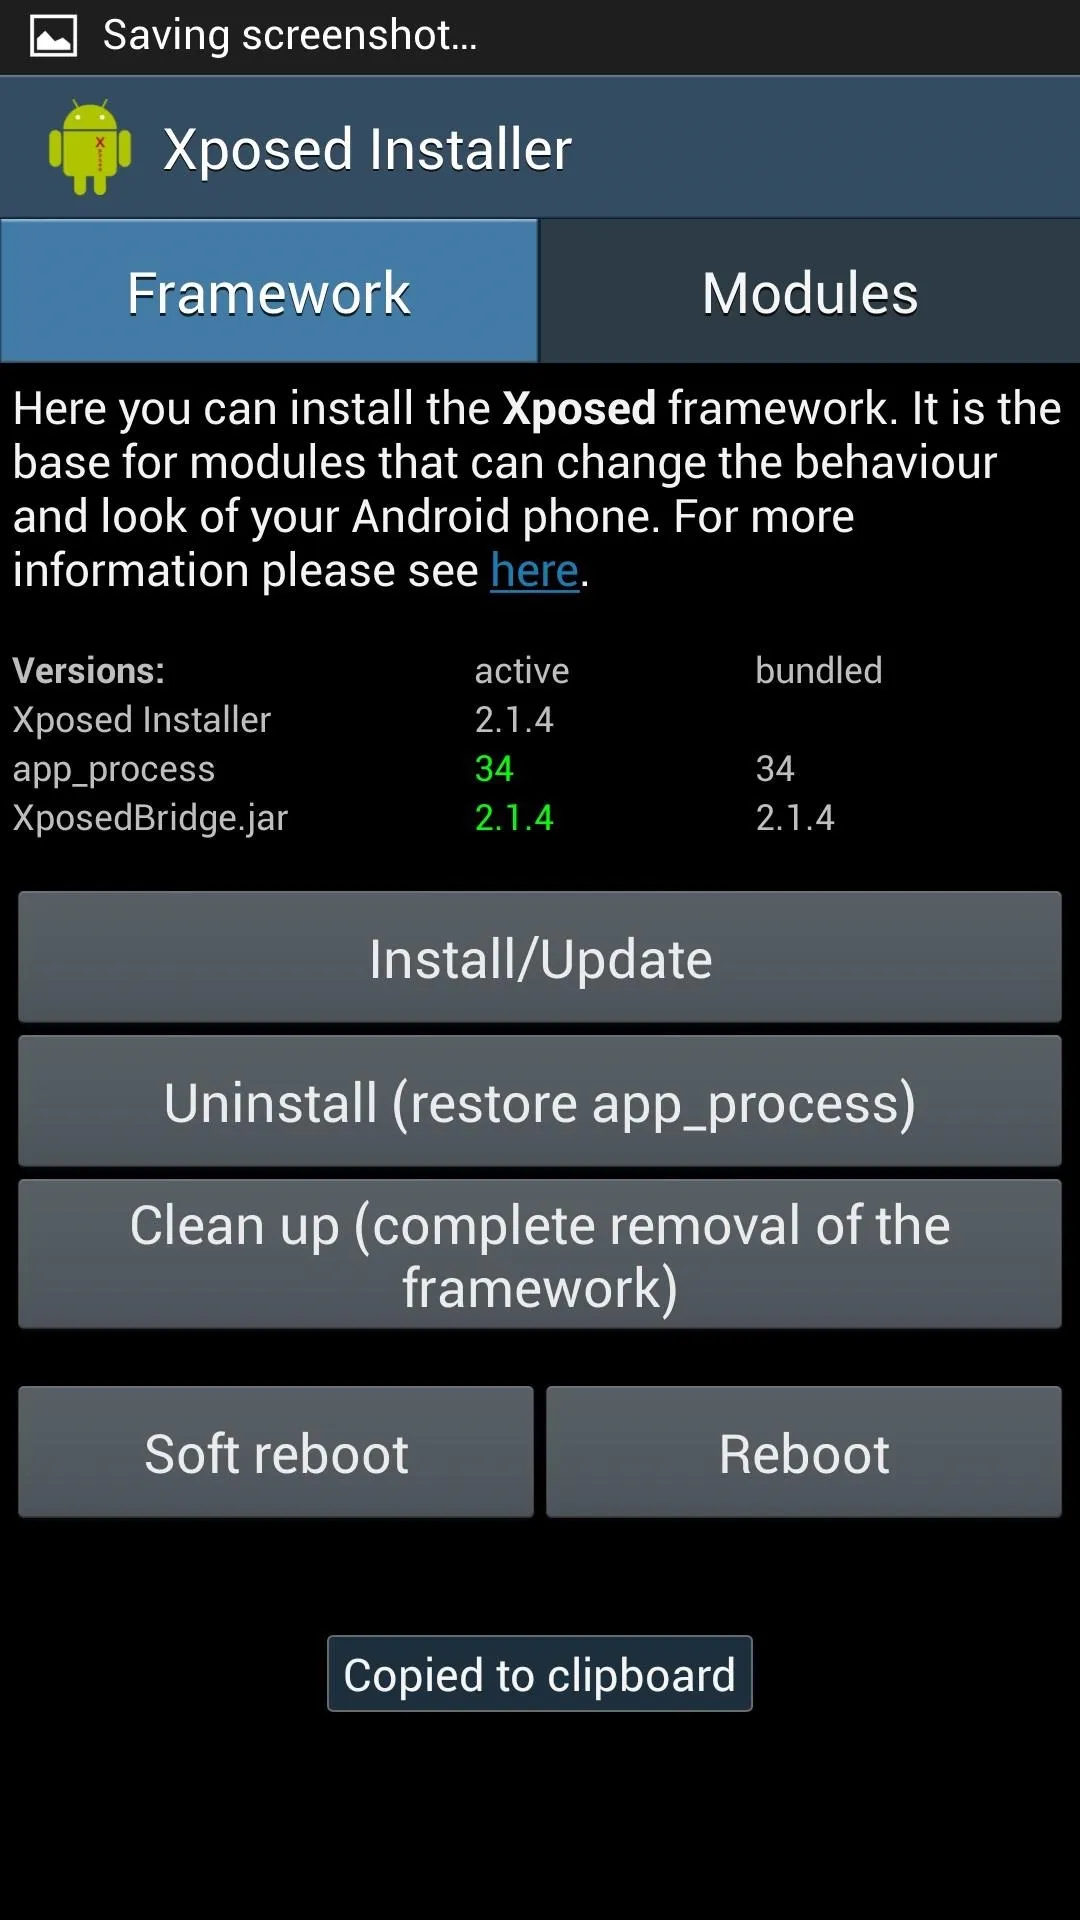
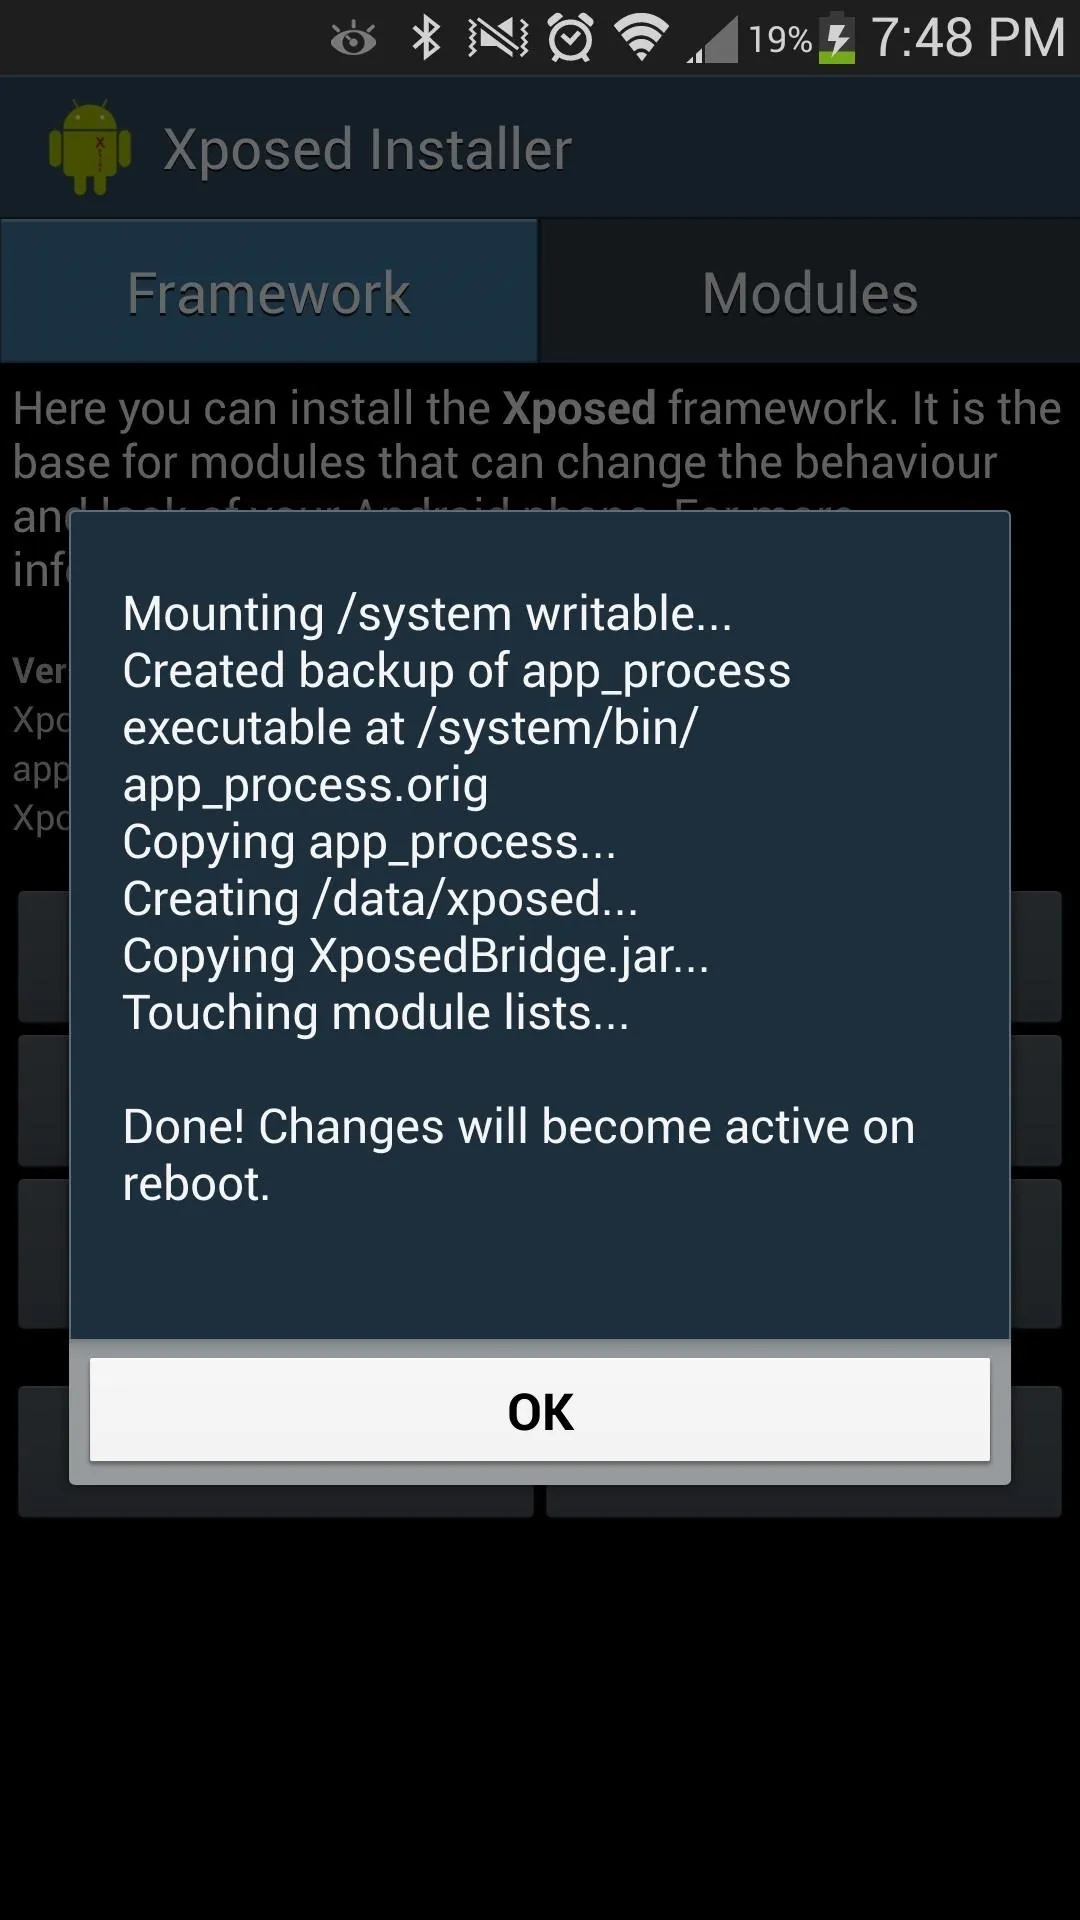


Once you're in, go ahead and hit the "Install/Update" button and let it do its thing. Throughout this process, you'll encounter SuperSU requests for root access; go ahead and grant those. Once you're done, hit "OK" and the "Reboot" button.
Step 2: Install Nottach Xposed
Now let's install the Nottach Xposed apk module. Simply install the file like you would any other. Once it's done, open the Xposed Installer that you previously downloaded (not this app). Then hit the "Modules" tab.
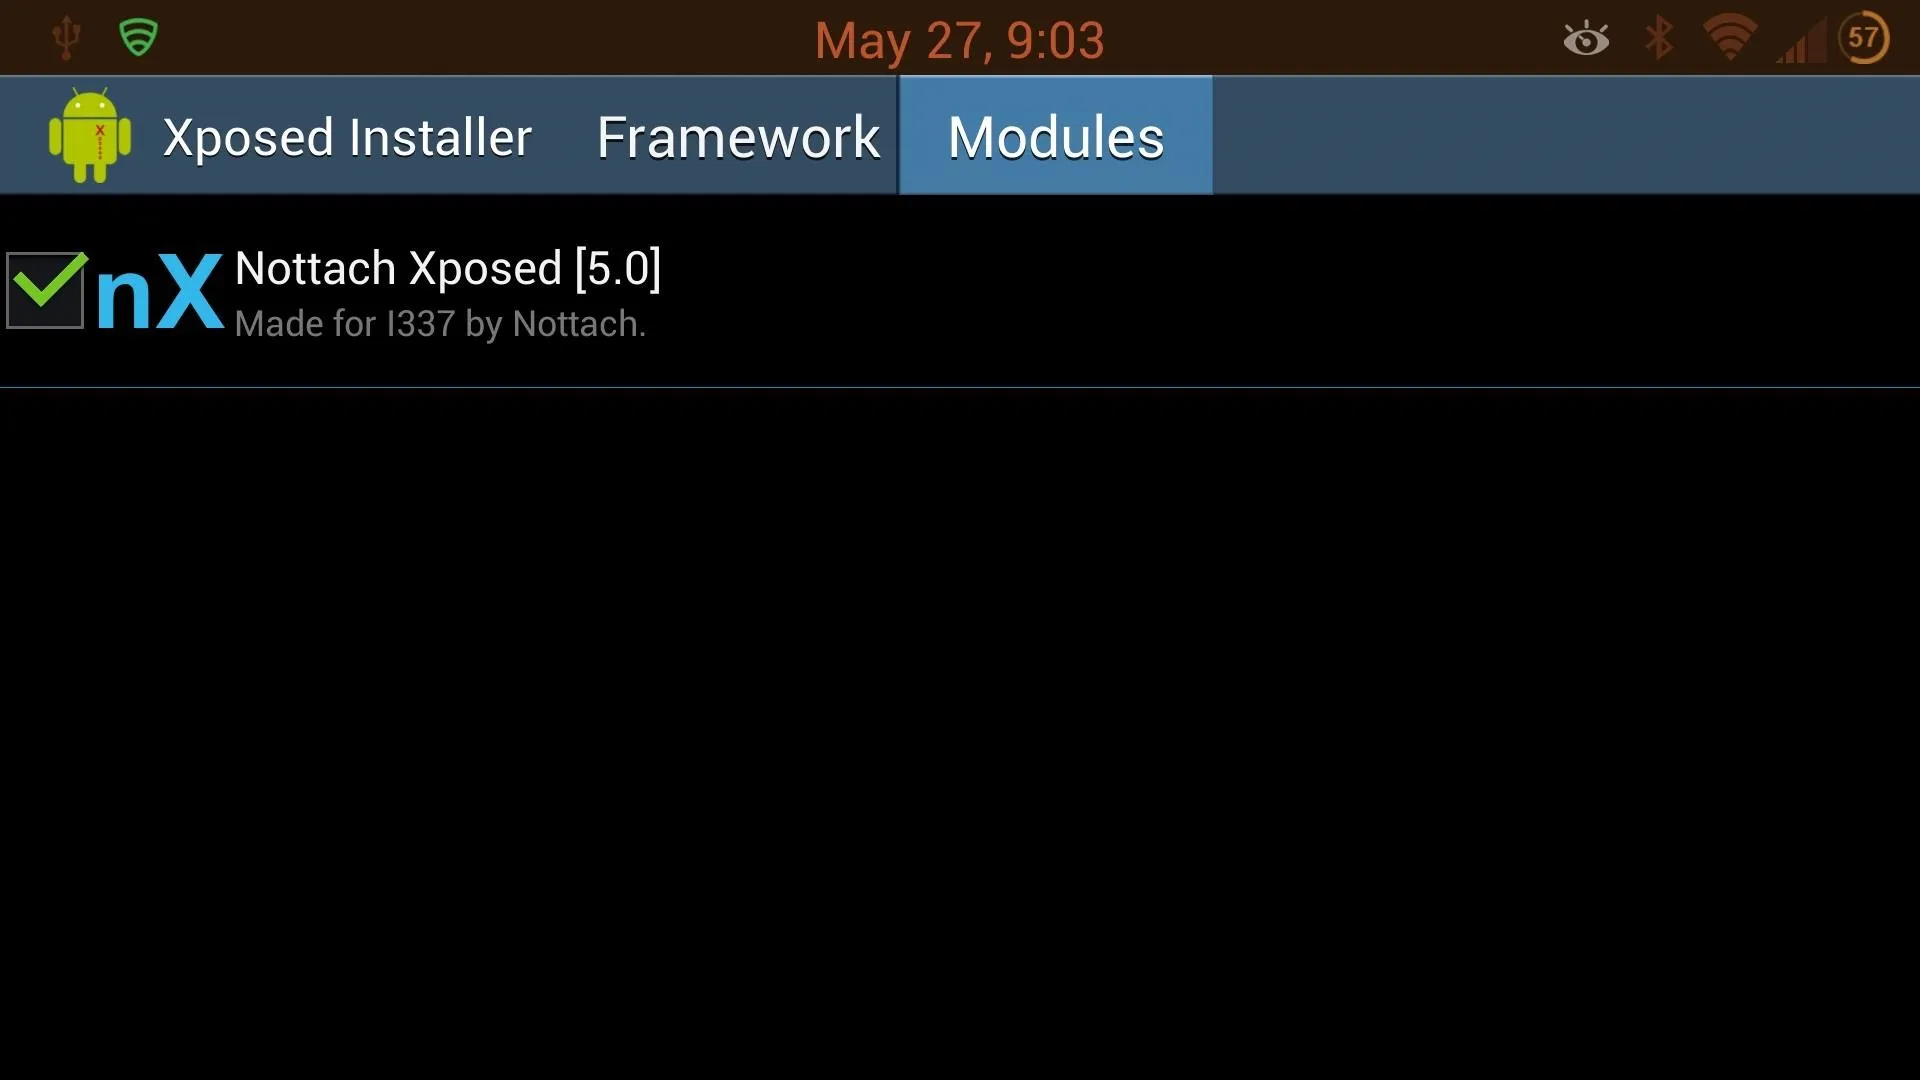
Once there, check the box next to Nottach Xposed, and then select the mod by pressing it.
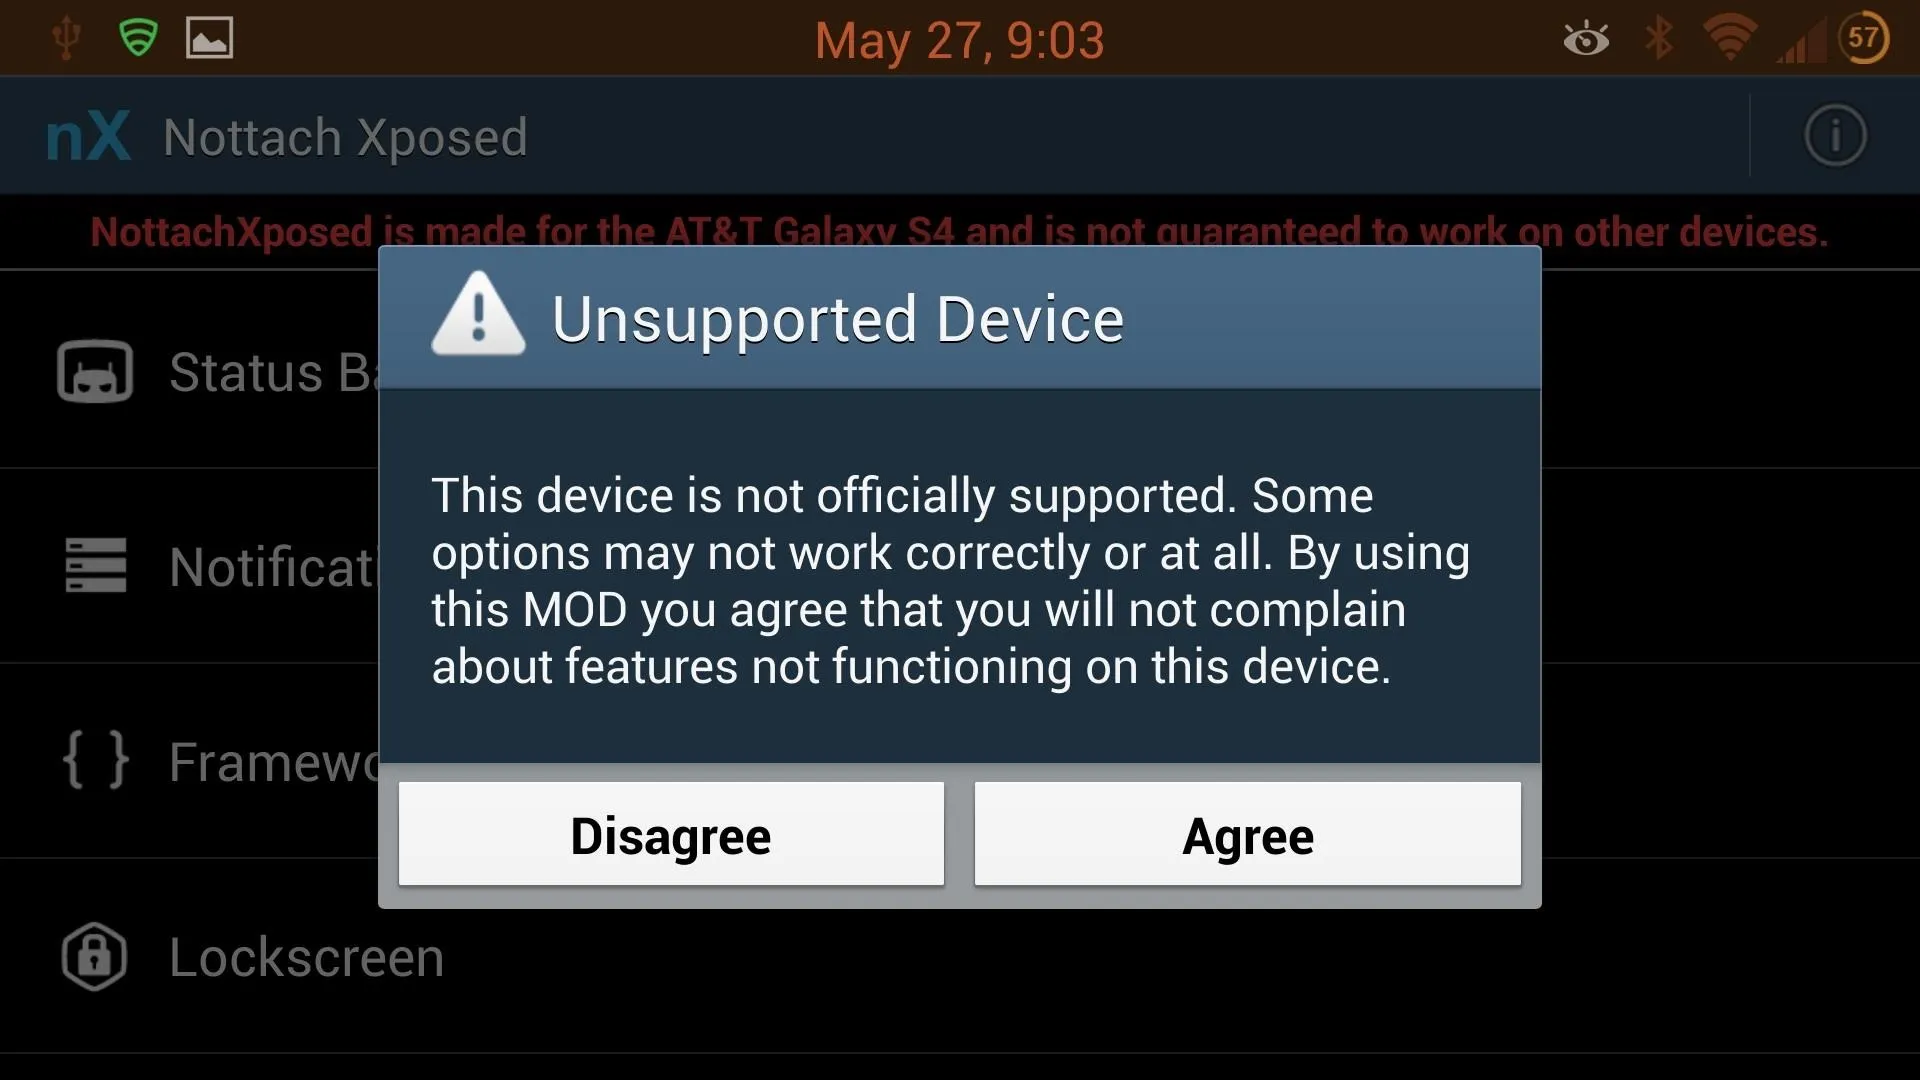
If you're using anything other than an AT&T variant, you'll see the above warning. Go ahead and hit "Agree"—we're not turning back now!
Before You Actually Begin Modding Your GS4
Everything is installed and ready, so let's see what we can do.
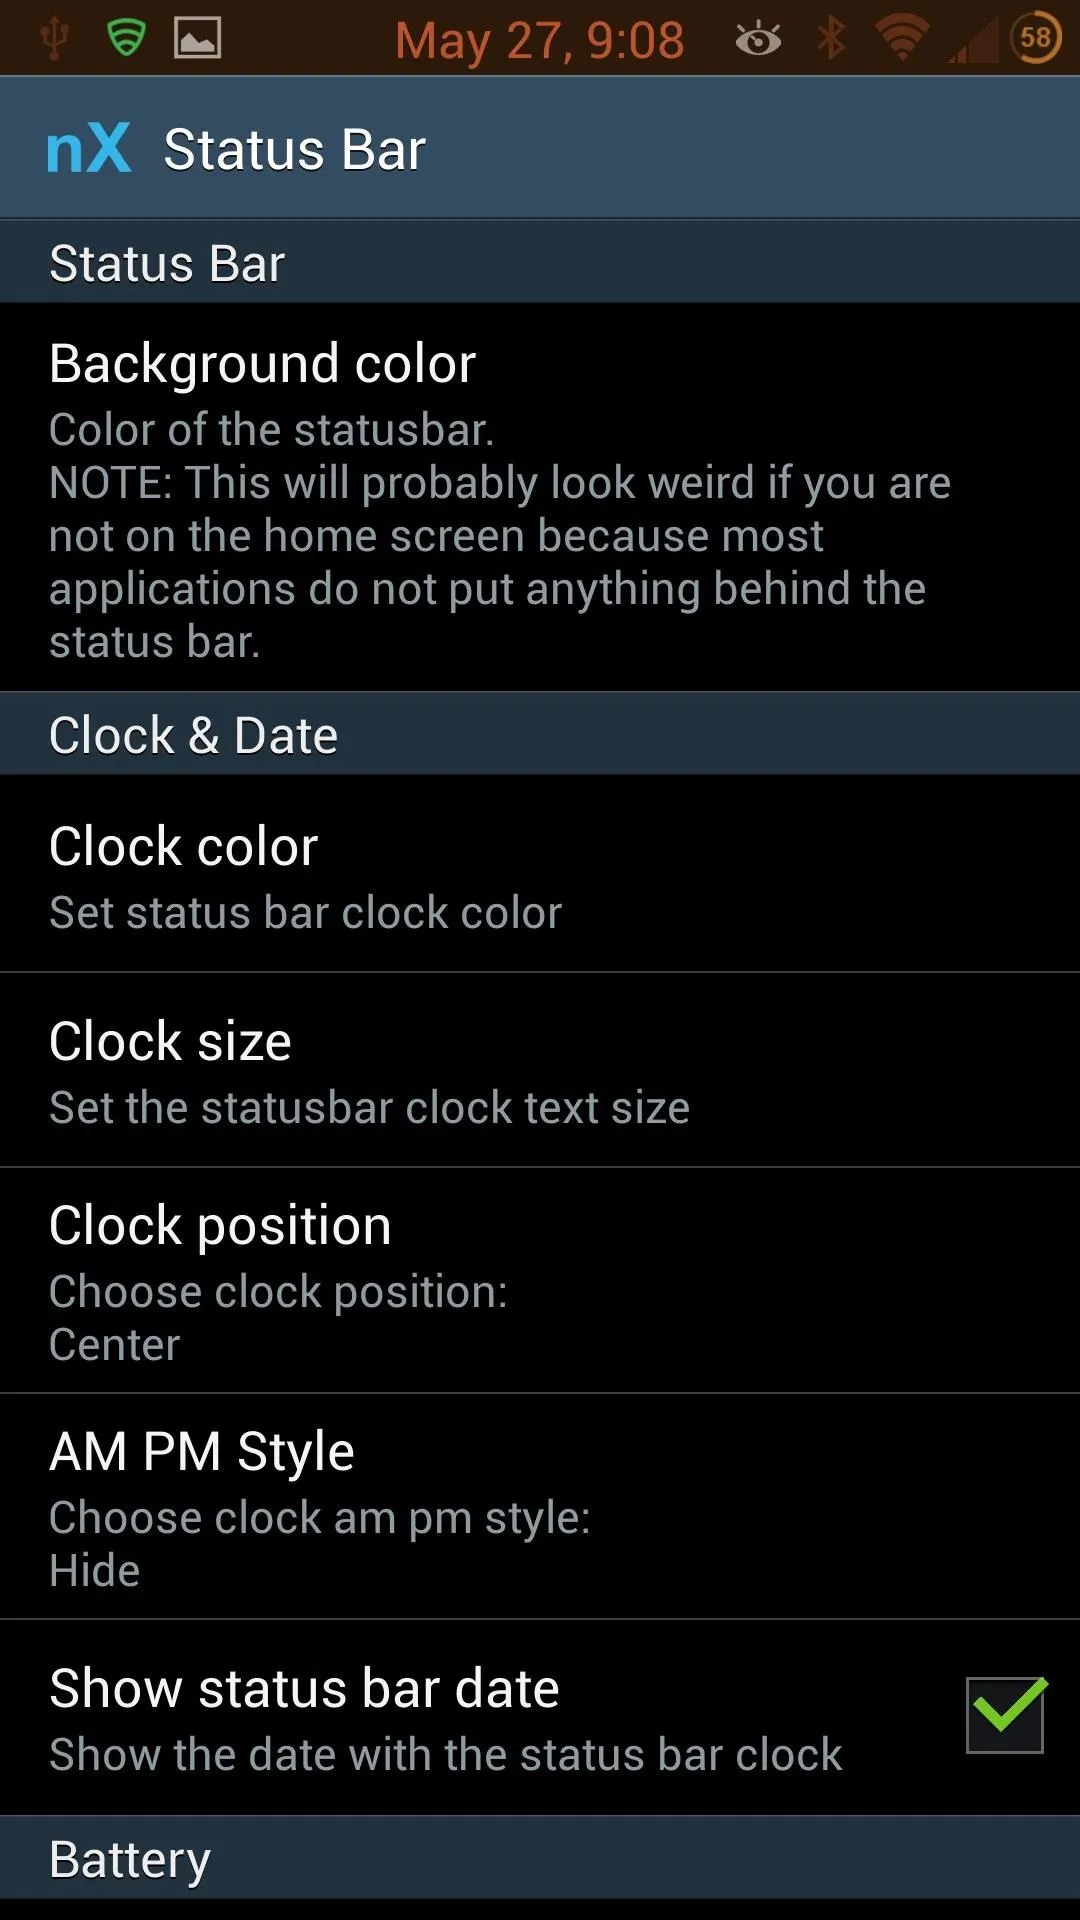
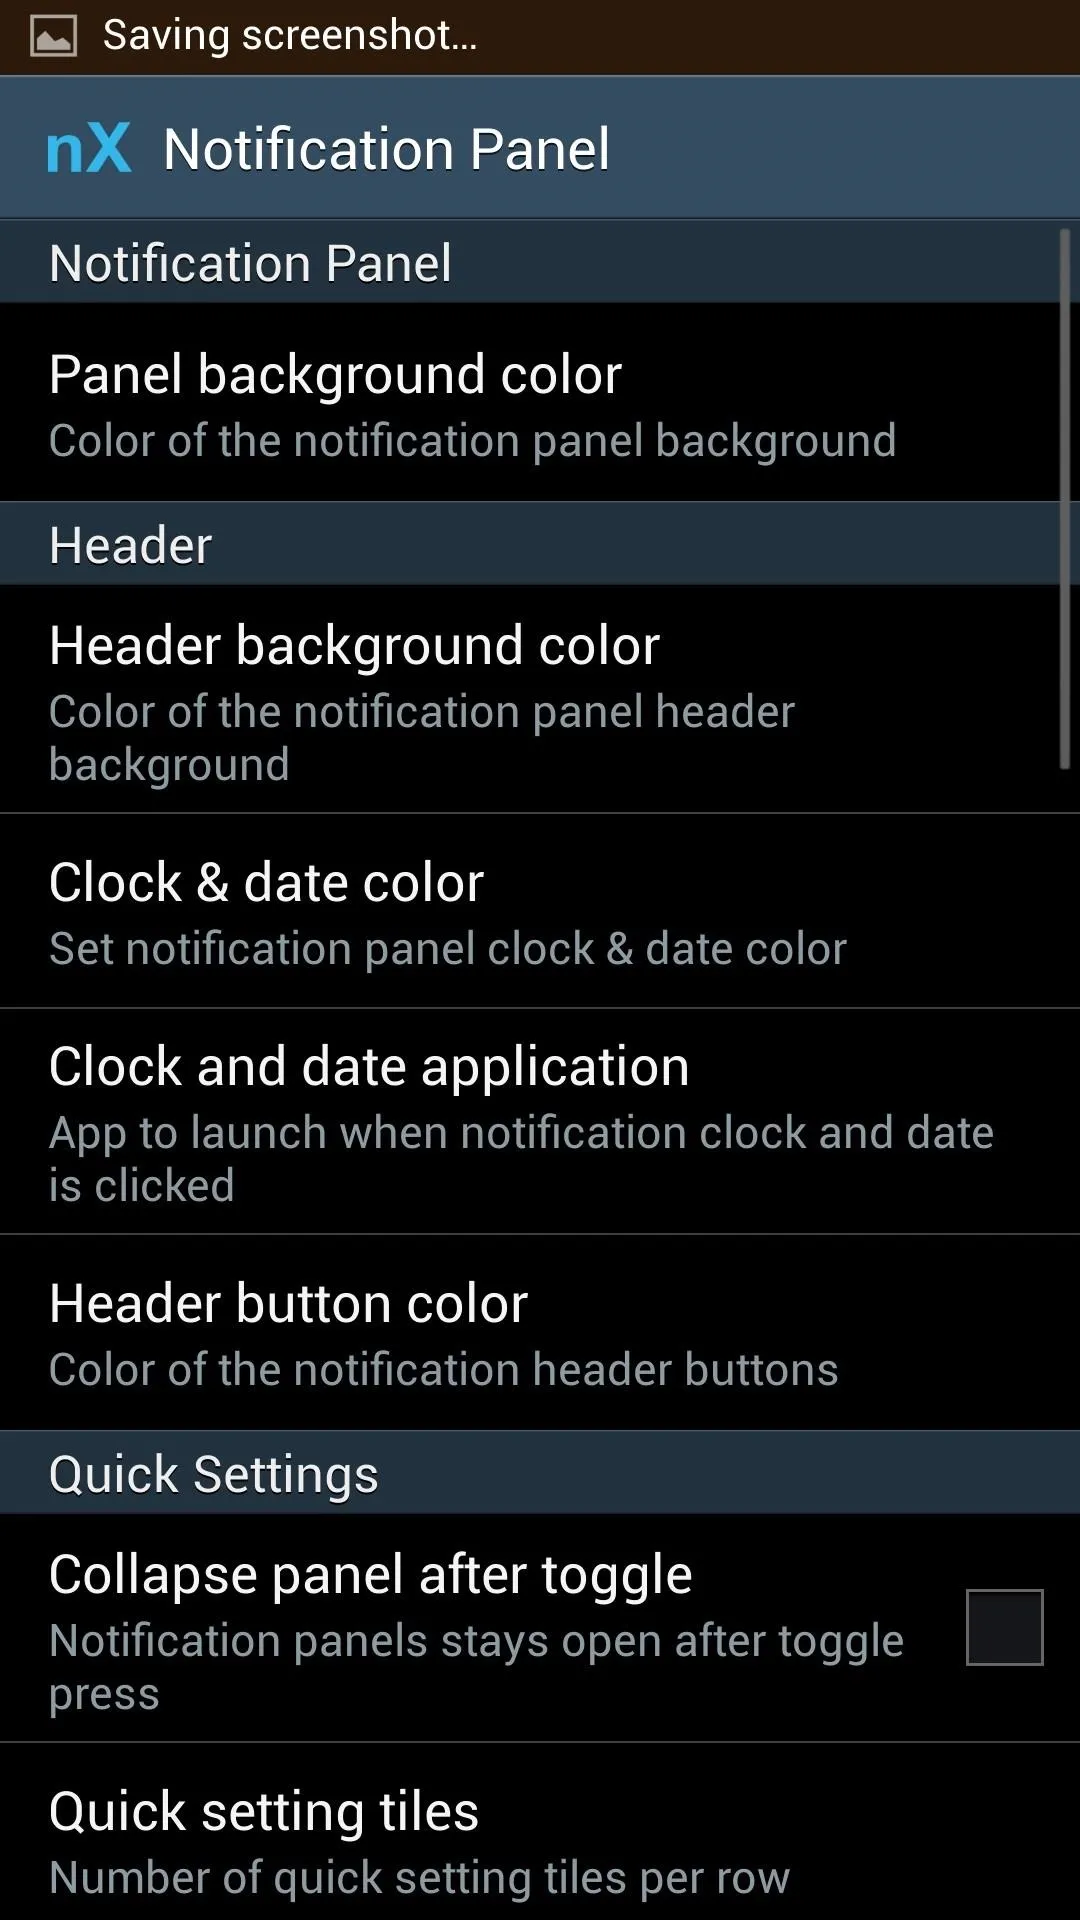
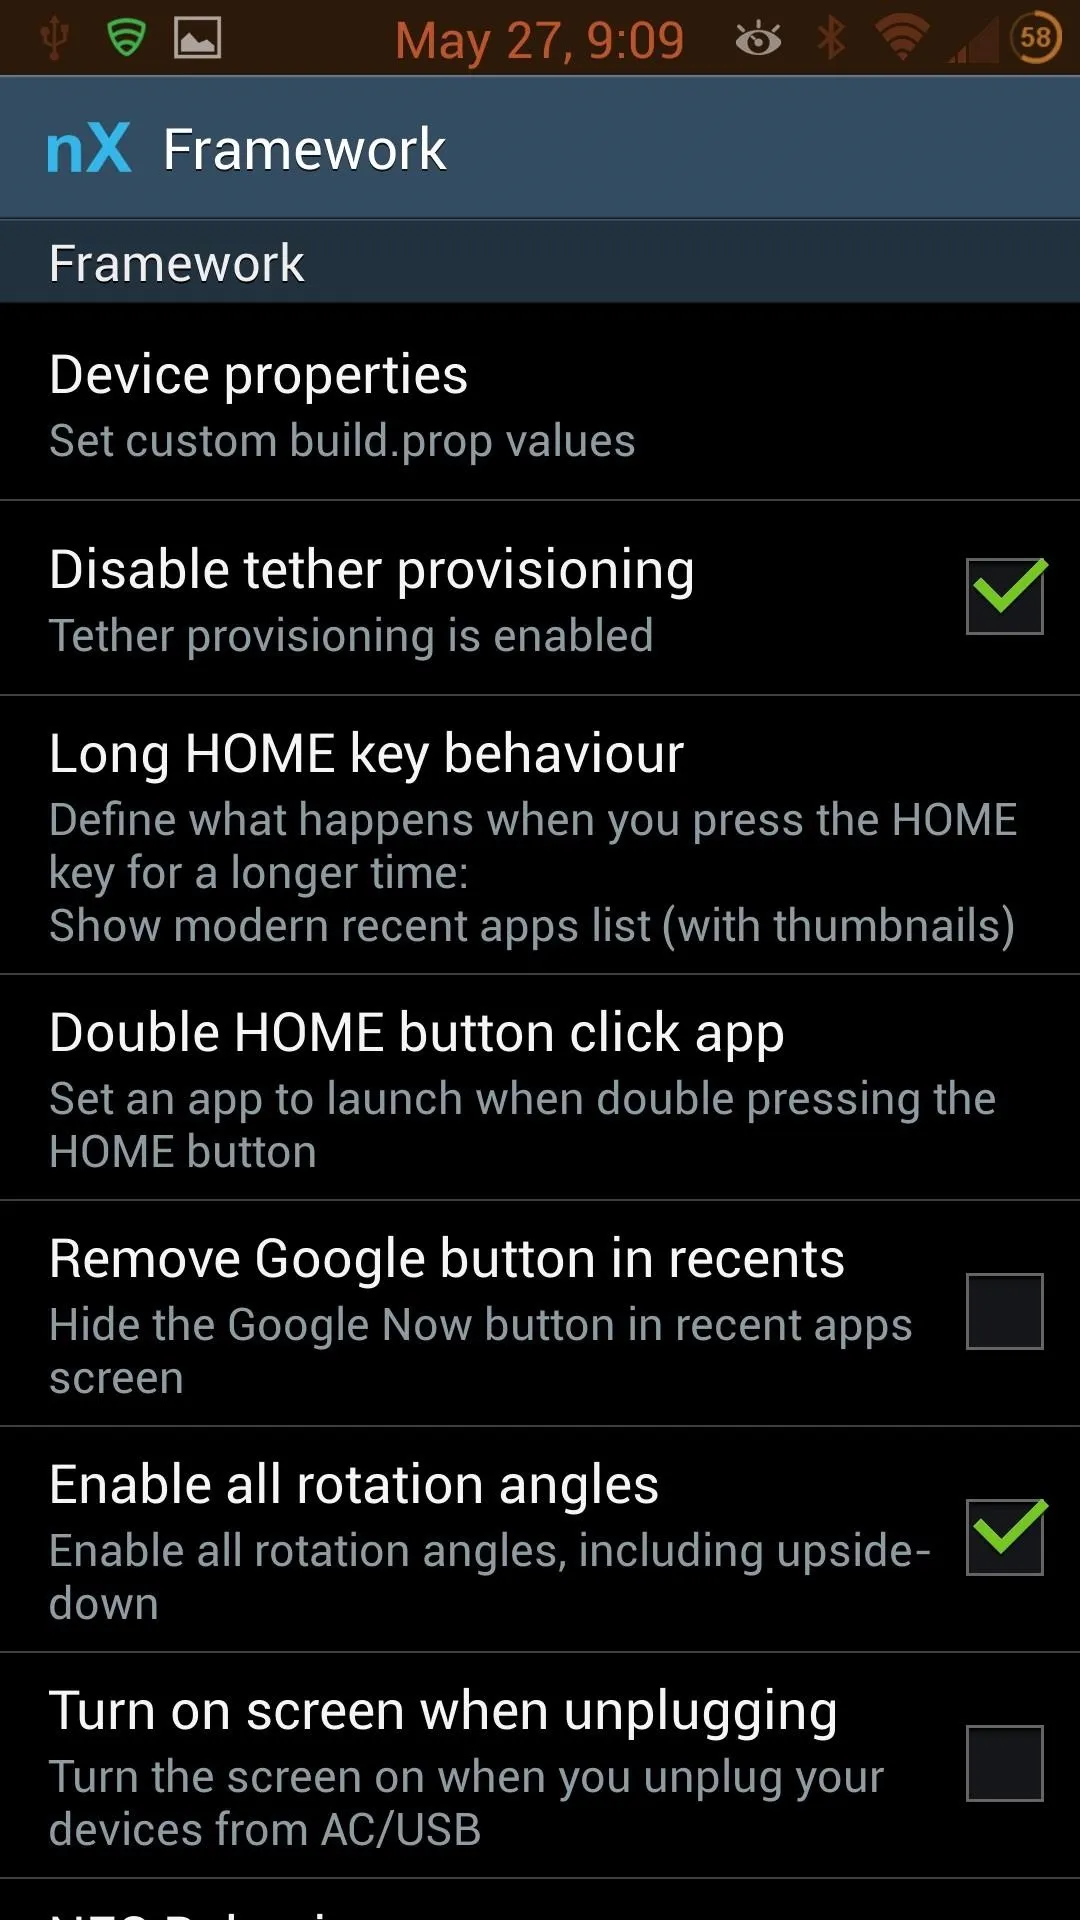


Whew! You wanted options, you got your options. There's a lot here, and it's going to be up to you to go through and customize to your hearts content. There are literally over 70 soft mods you can use to tweak your GS4.
I'll cover some of my favorites, but before we get to those, there are a couple of things to remember.
Note 1: Most (if Not All) Changes Will Require at Least a Soft Reboot
You are messing with core system files here, so in almost all cases, the system will need to restart for changes to take effect.
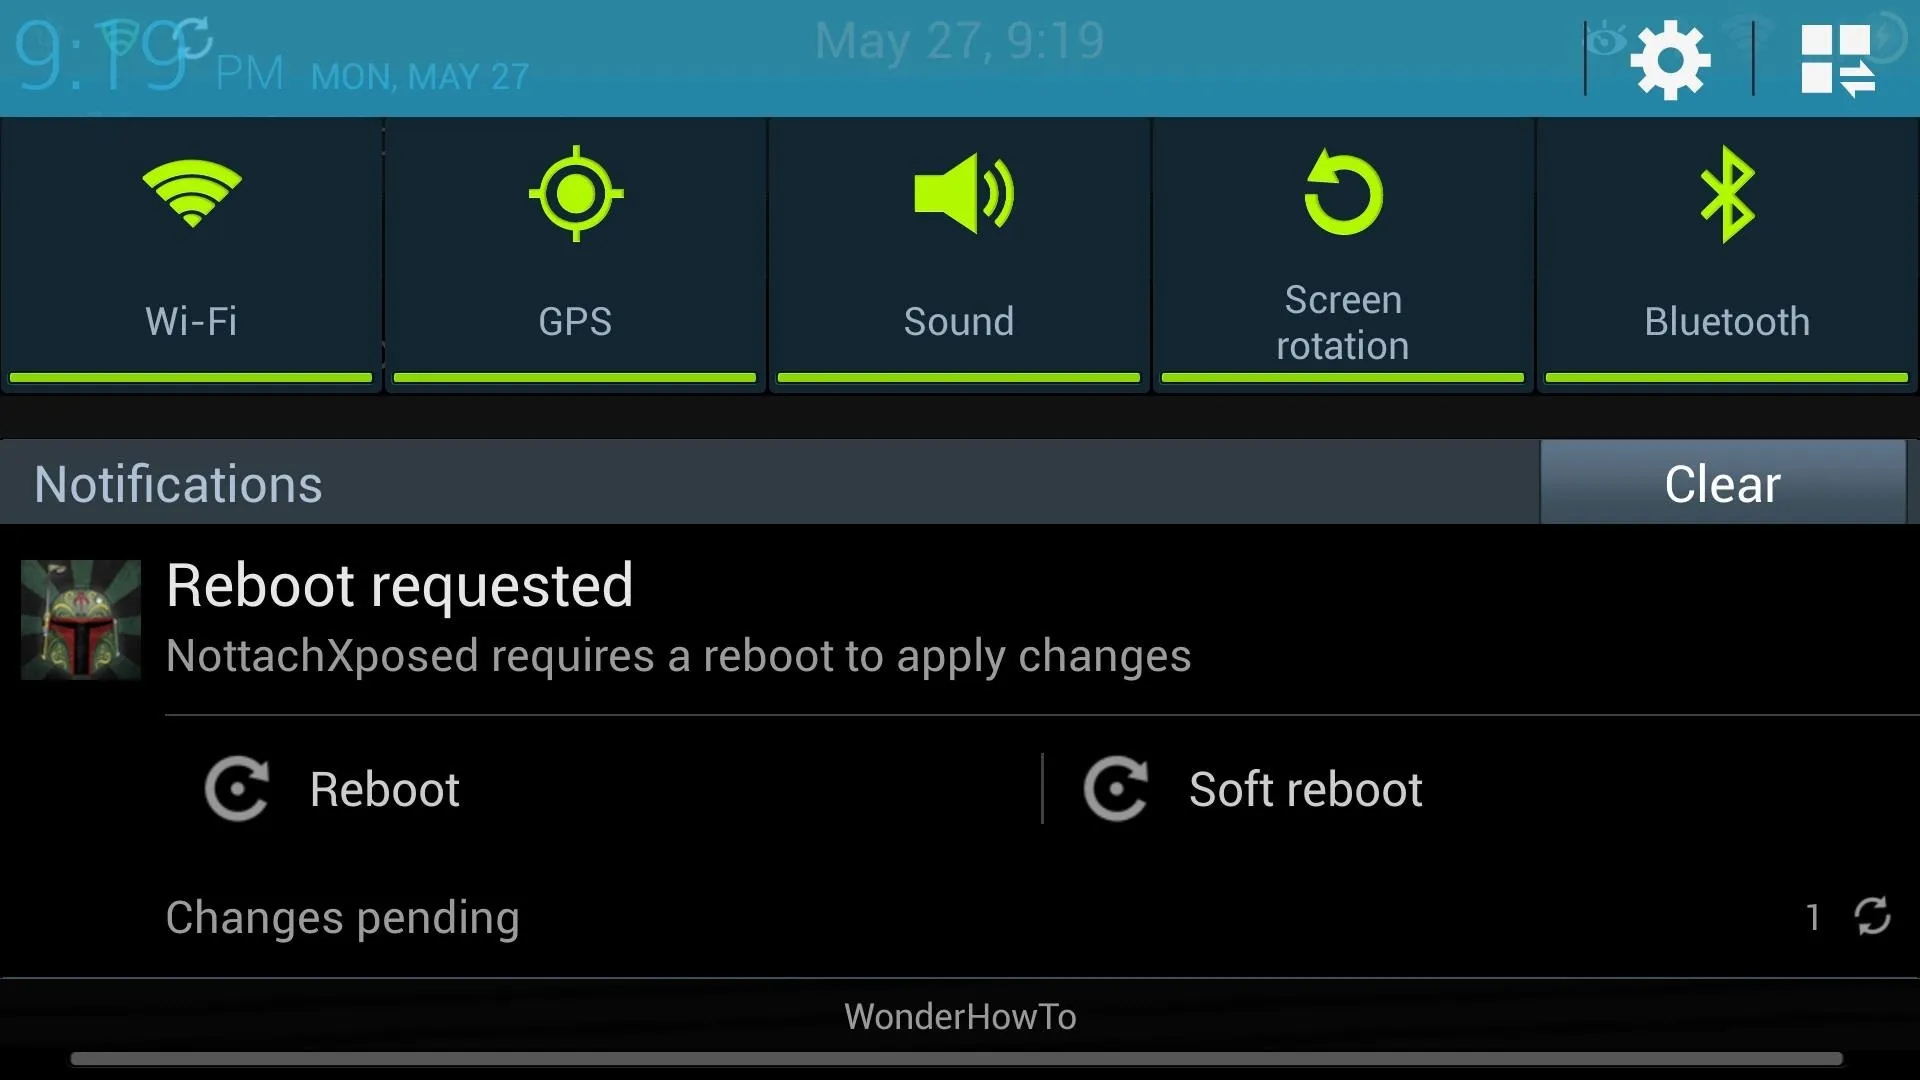
The mod makes this really easy for you. Change whatever you want, and manually reboot, or use the two options in the notification drawer. A soft reboot will usually work, but if you find that your mod did not take effect, try a normal reboot.
Note 2: Mods Need to Be Activated
When I first ran this, I just could not get it to work. There were two things in my way, and they were both simple things that I overlooked. First, I didn't make sure to check the module in Xposed Installer. Second, I didn't activate the mods.
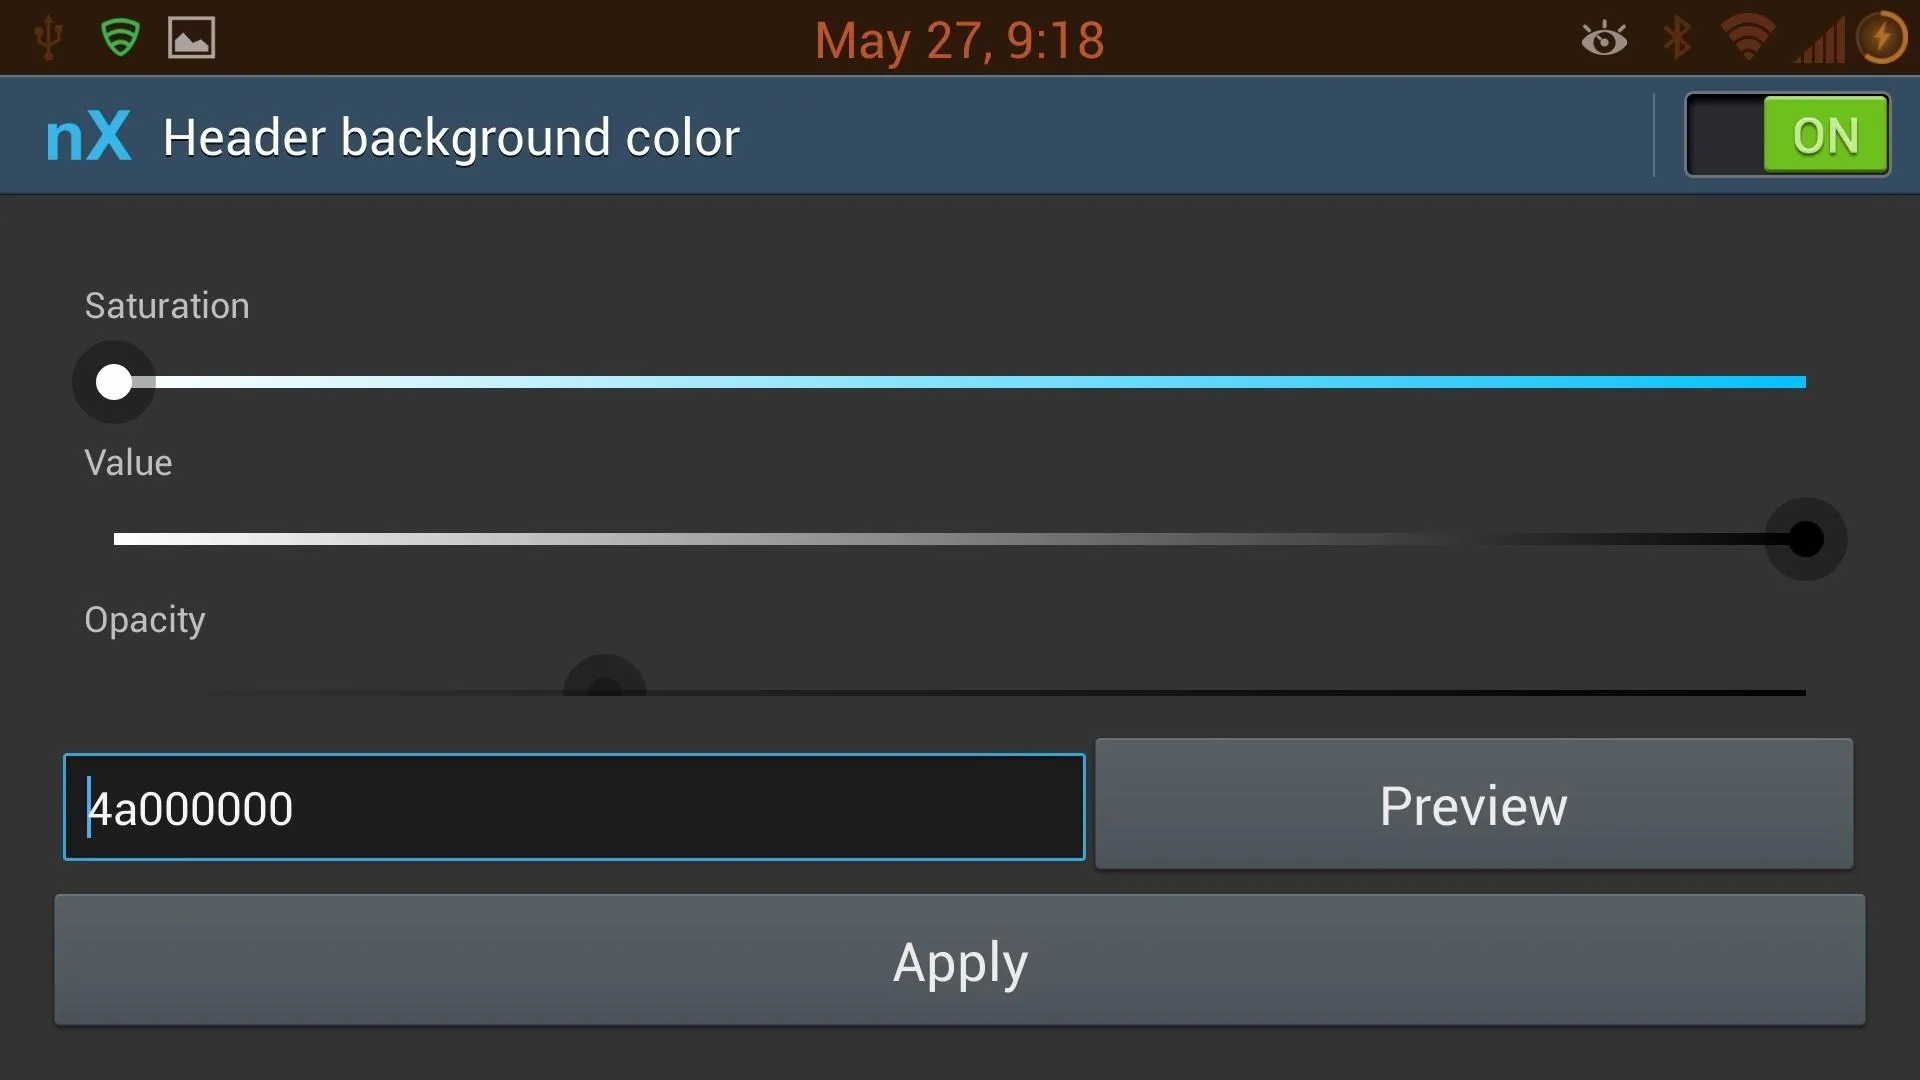
Take notice of the switch in the top right of the picture. Most mods will have this, so make sure the switch is in the "On" position.
That's it, you've got all the knowledge you need to get started.
My Favorite Mods & Hacks
Now, let's take a look at some of the mods I installed on my GS4 using Nottach Xposed. There's a ton that you can do, but these are my favorites.
Mod 1: Messaging Screen On
One thing that frustrates me the most about the Galaxy GS4 is that the screen comes on when I receive a text. Well, that's about to be history. Select "Messaging" and check "Show screen on toggle."
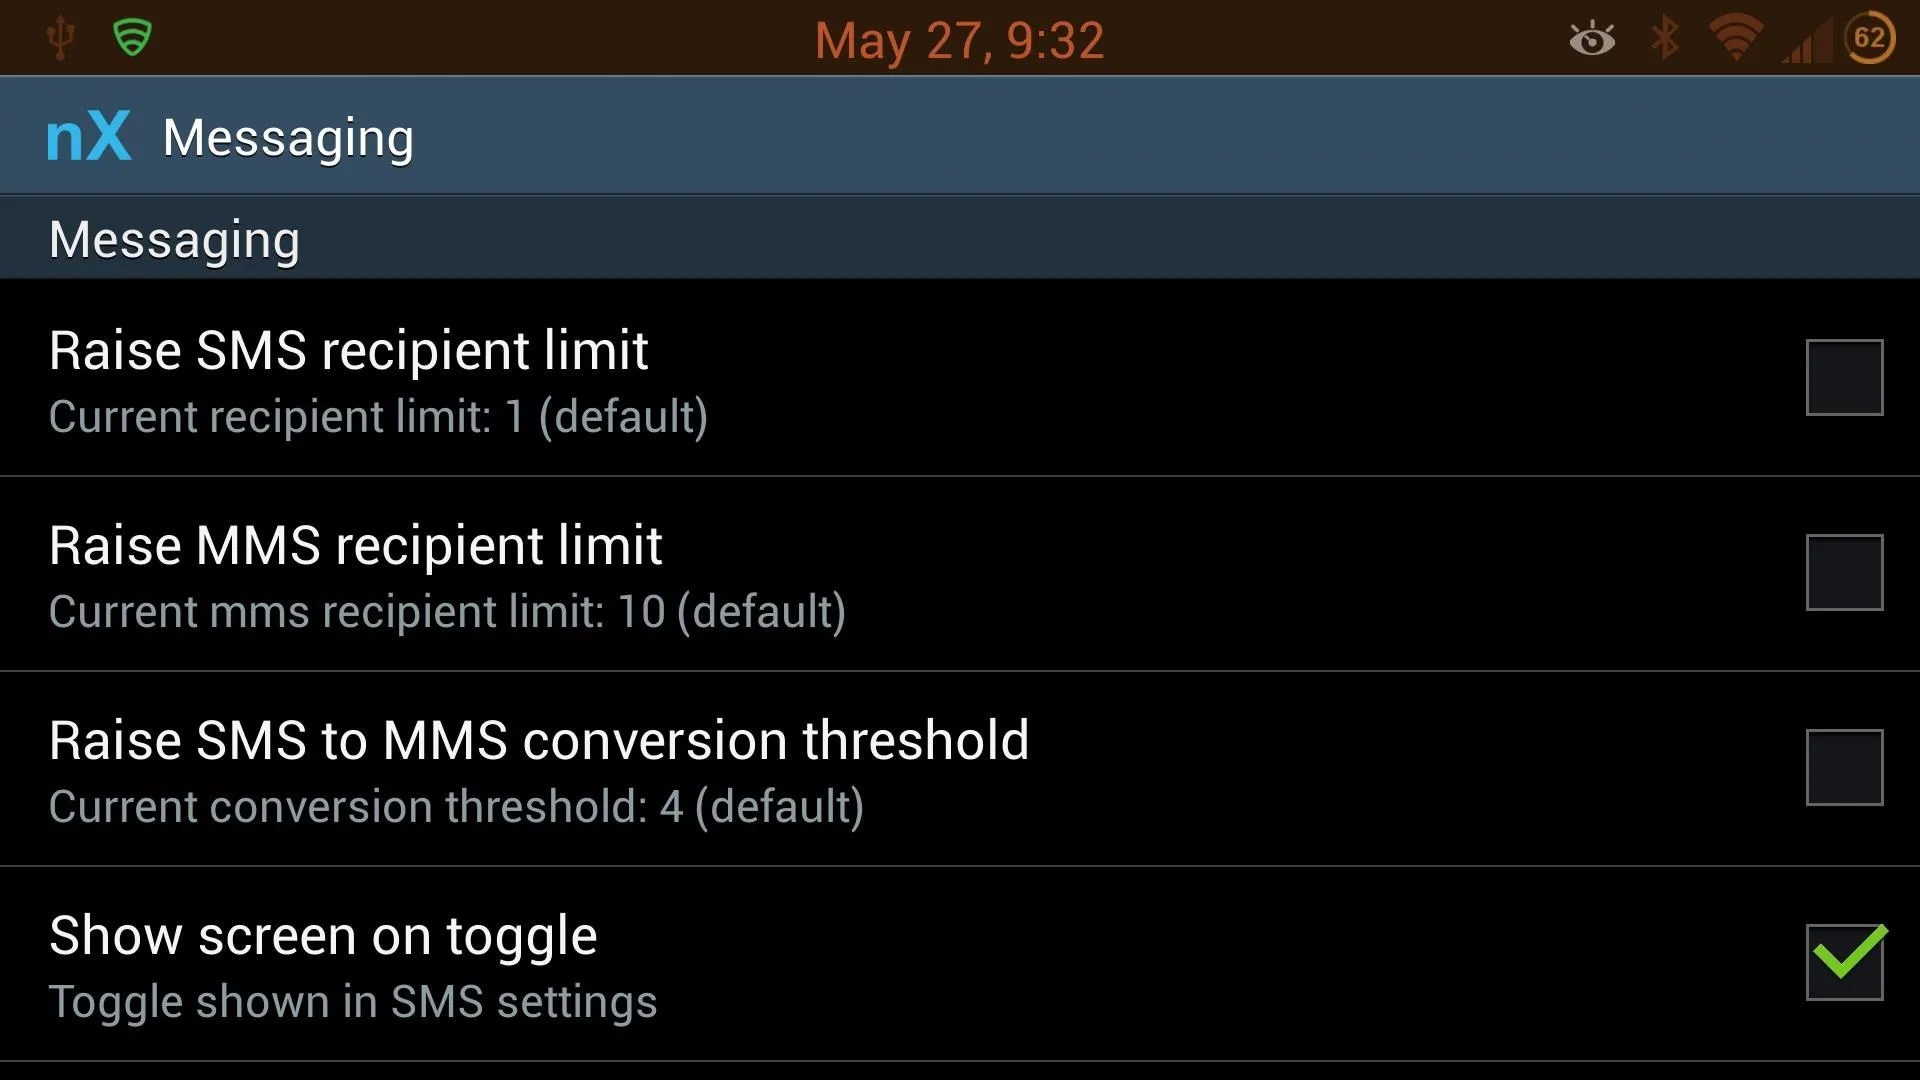
This is an option that Samsung built in to their Messaging app, but for whatever reason never allowed end users to mess with (or maybe the carriers made that decision). In any regard, we can fix it. After checking the option and rebooting, go to the Messaging app Settings and scroll down.
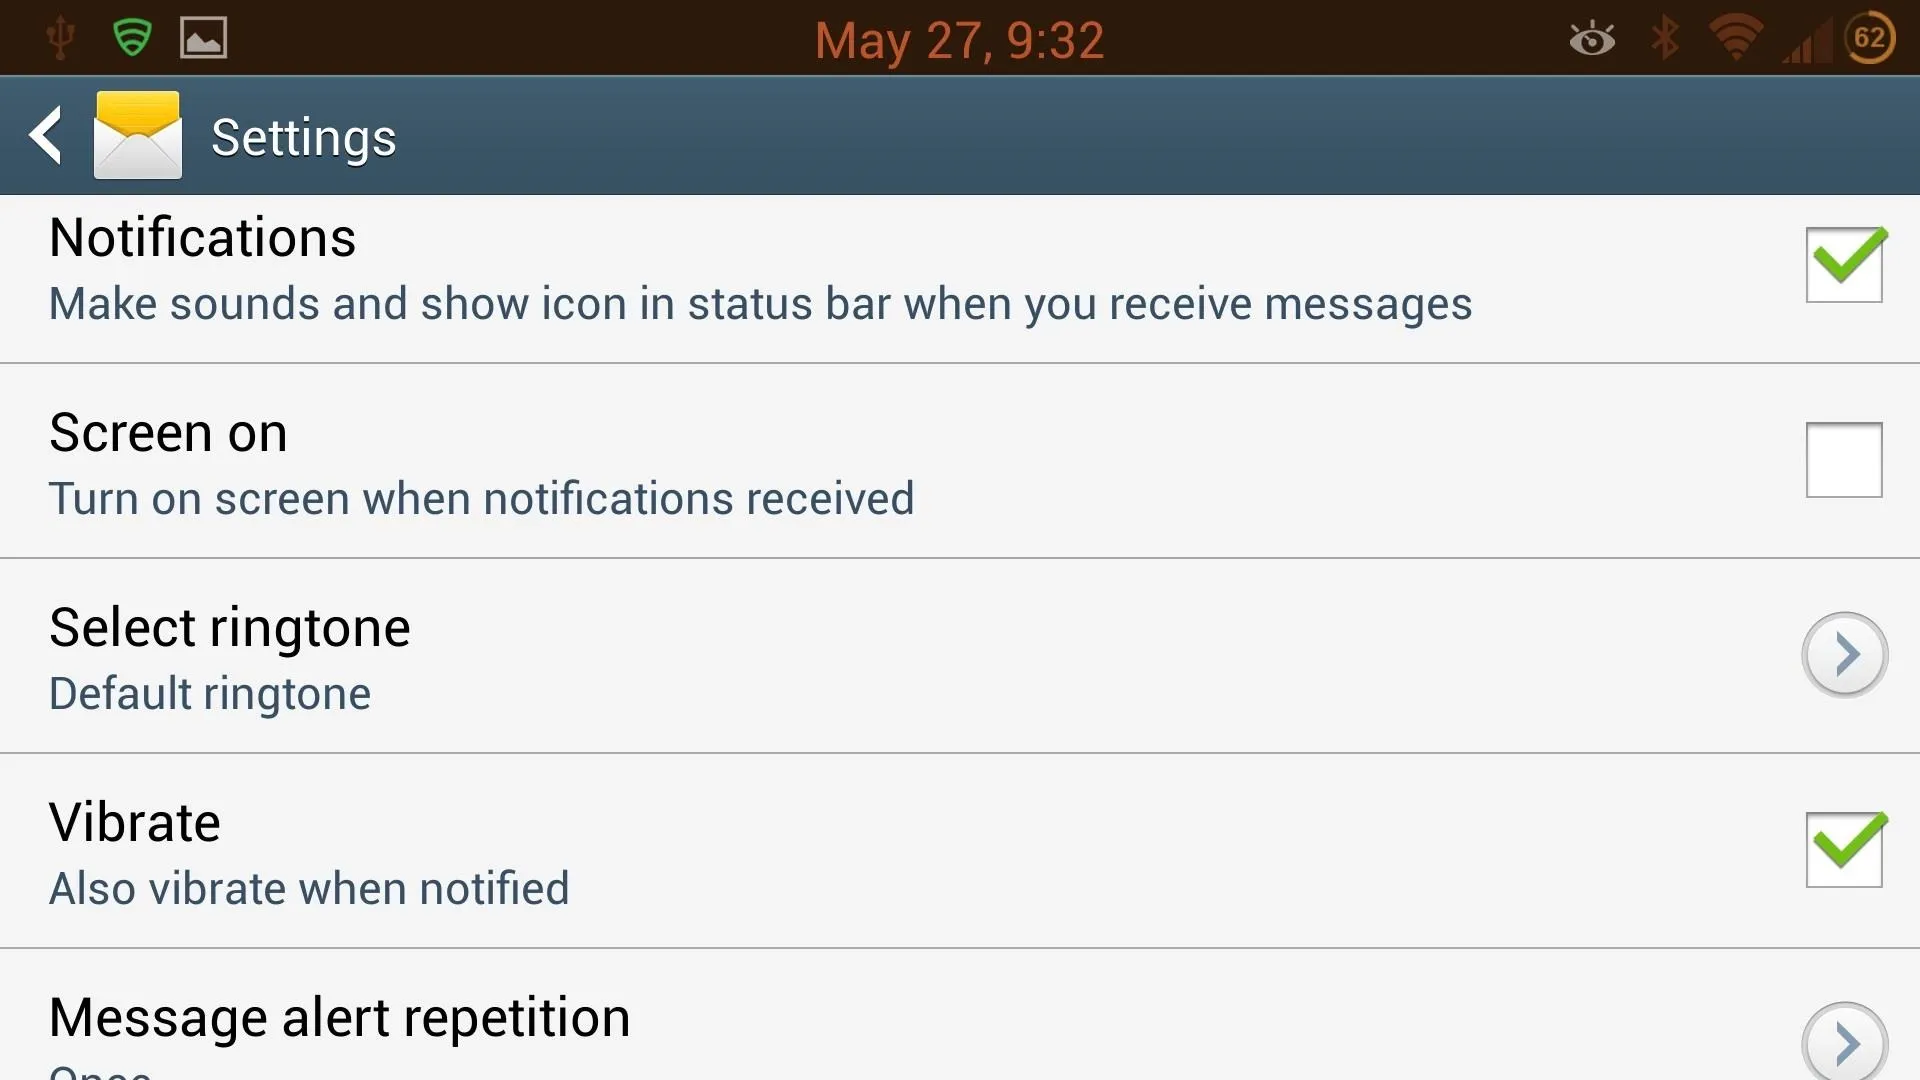
Now you've got the option to keep the screen from coming on after receiving a text.
Mod 2: Changing Carrier Labels
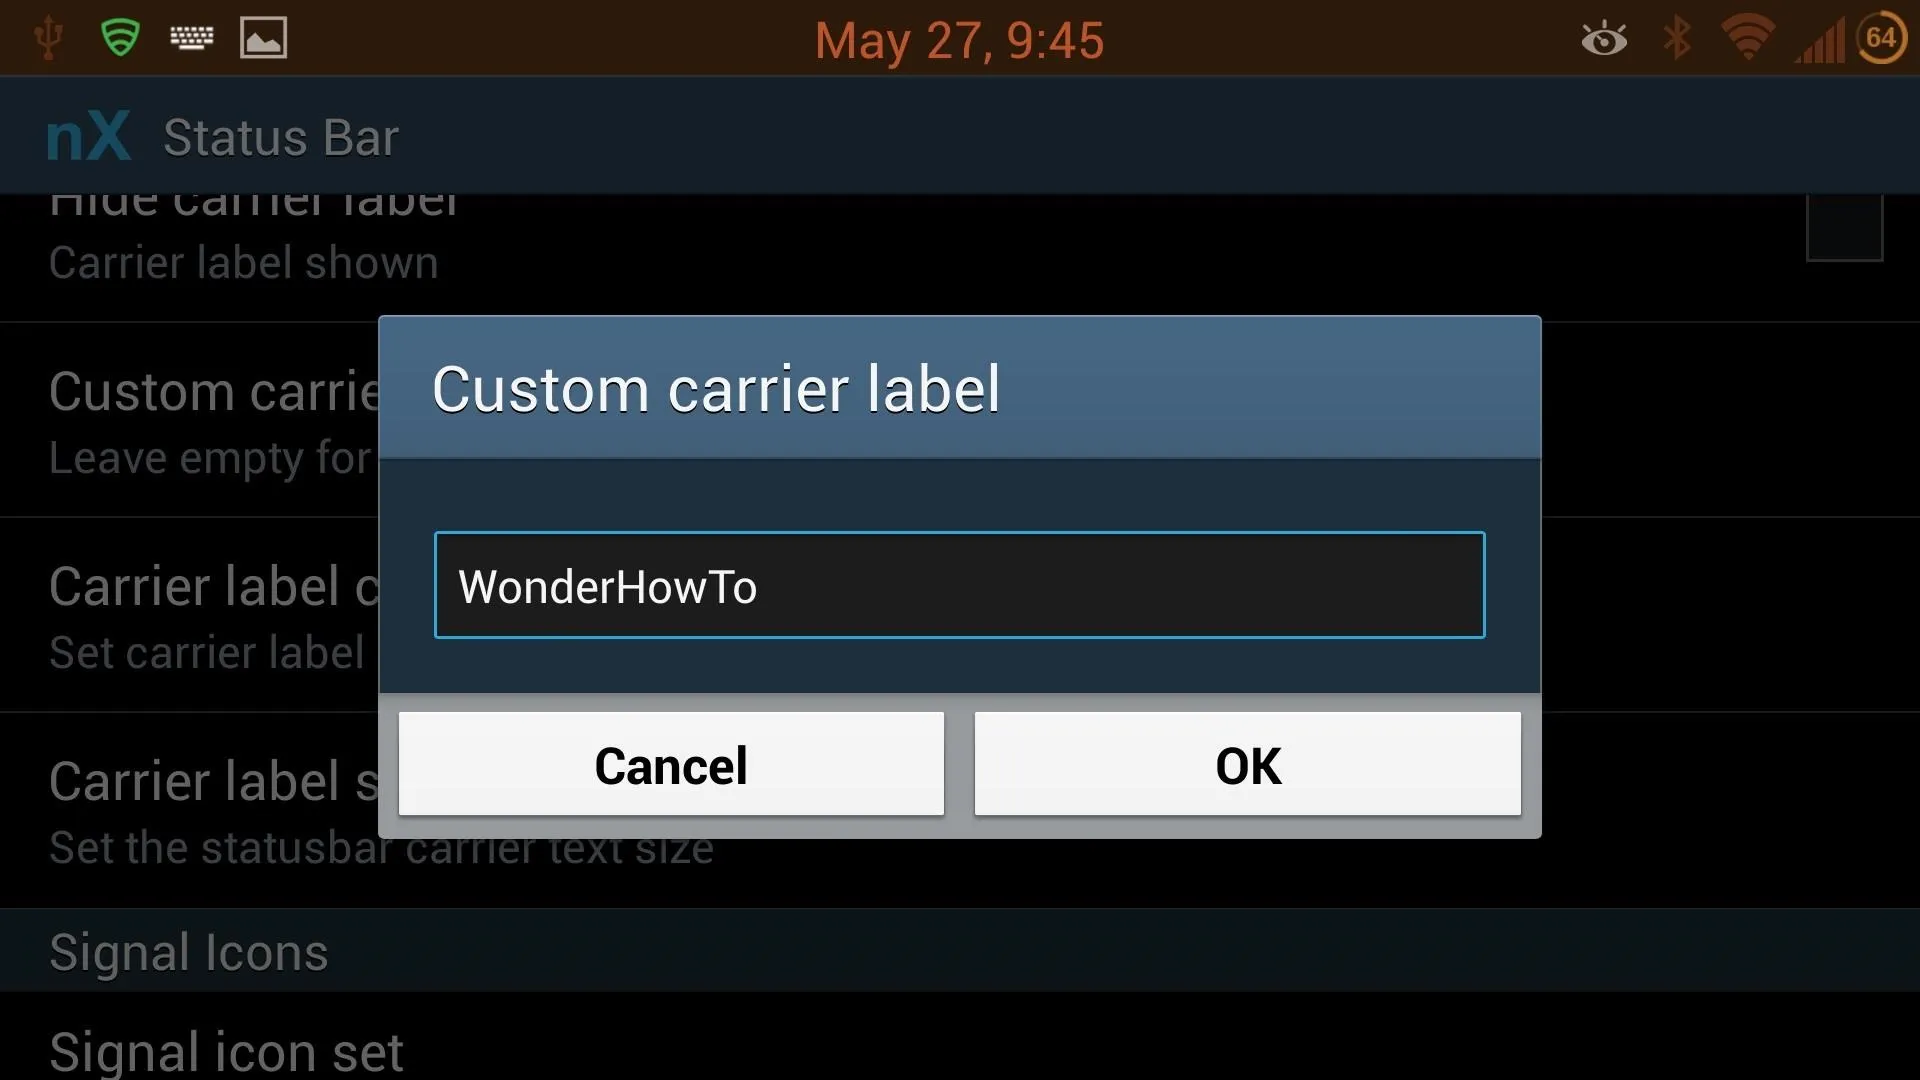
Your phone probably advertises your carrier's name—if not on the physical body, then on your lockscreen and notification drawer. That's no fun, and while changing the body is tough, the other two aren't. Here I've changed mine to "WonderHowTo" (but you can make yours say whatever you like).
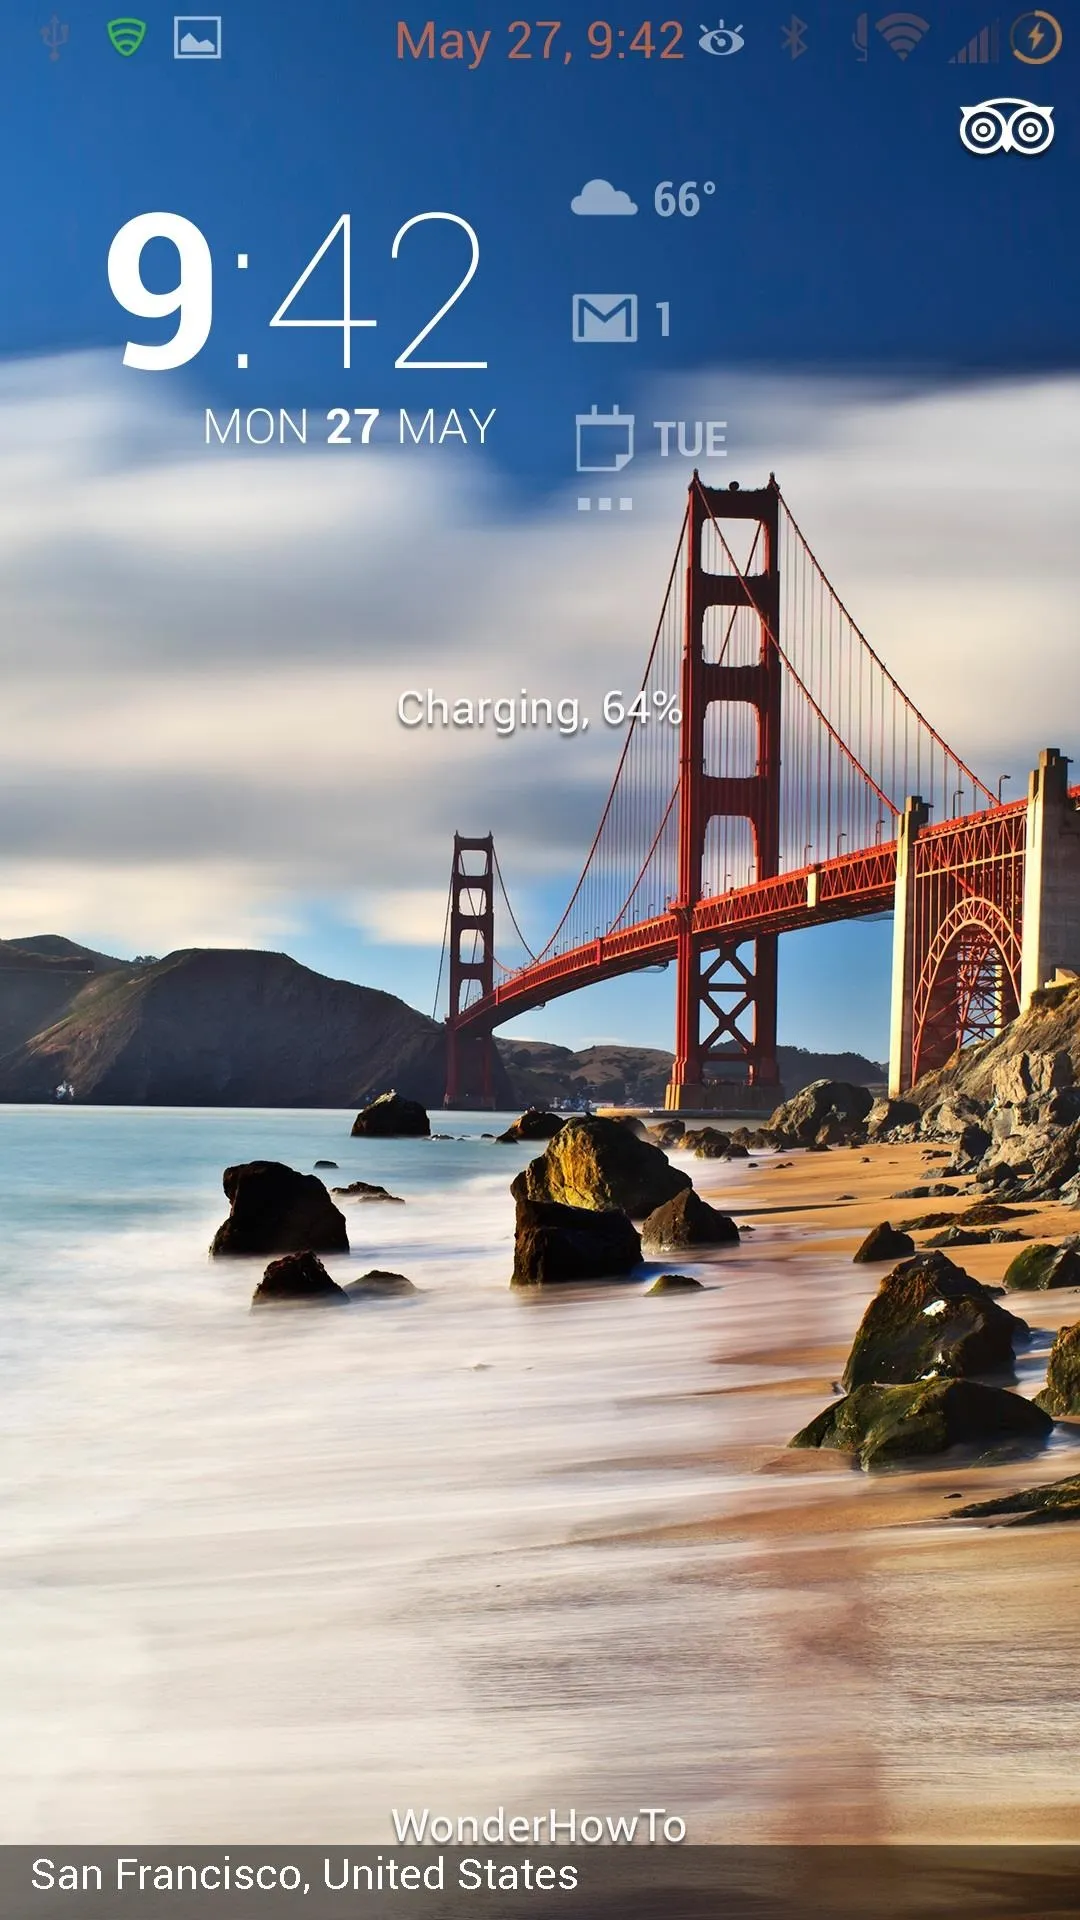
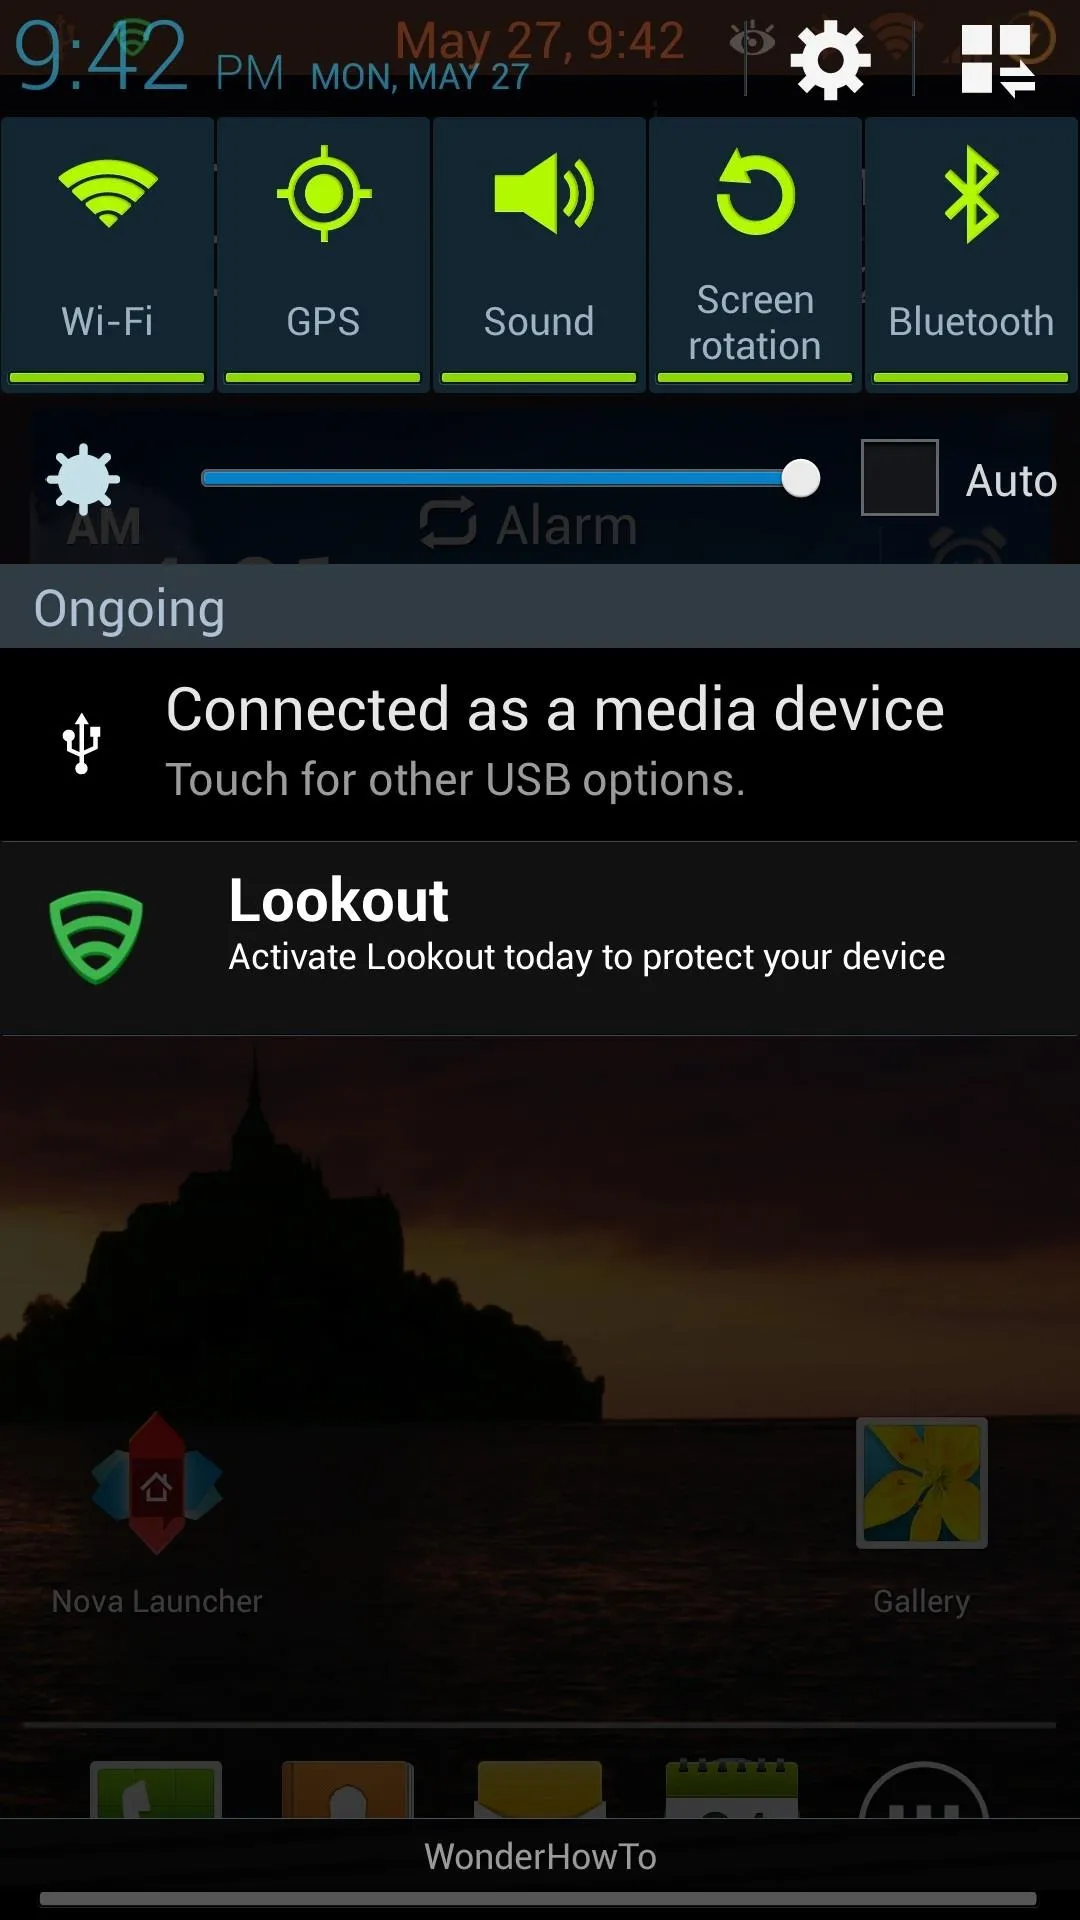


Yeah it's a little thing, but it's a little thing that we can control. You'll find these options in Lockscreen -> Custom carrier label and Status Bar -> Carrier Label.
Mod 3: Transparent Notification Bar
This theme mod is a mainstay in all my devices, and it's super simple with Nottach Xposed. Go to Notification Panel -> Panel background color.
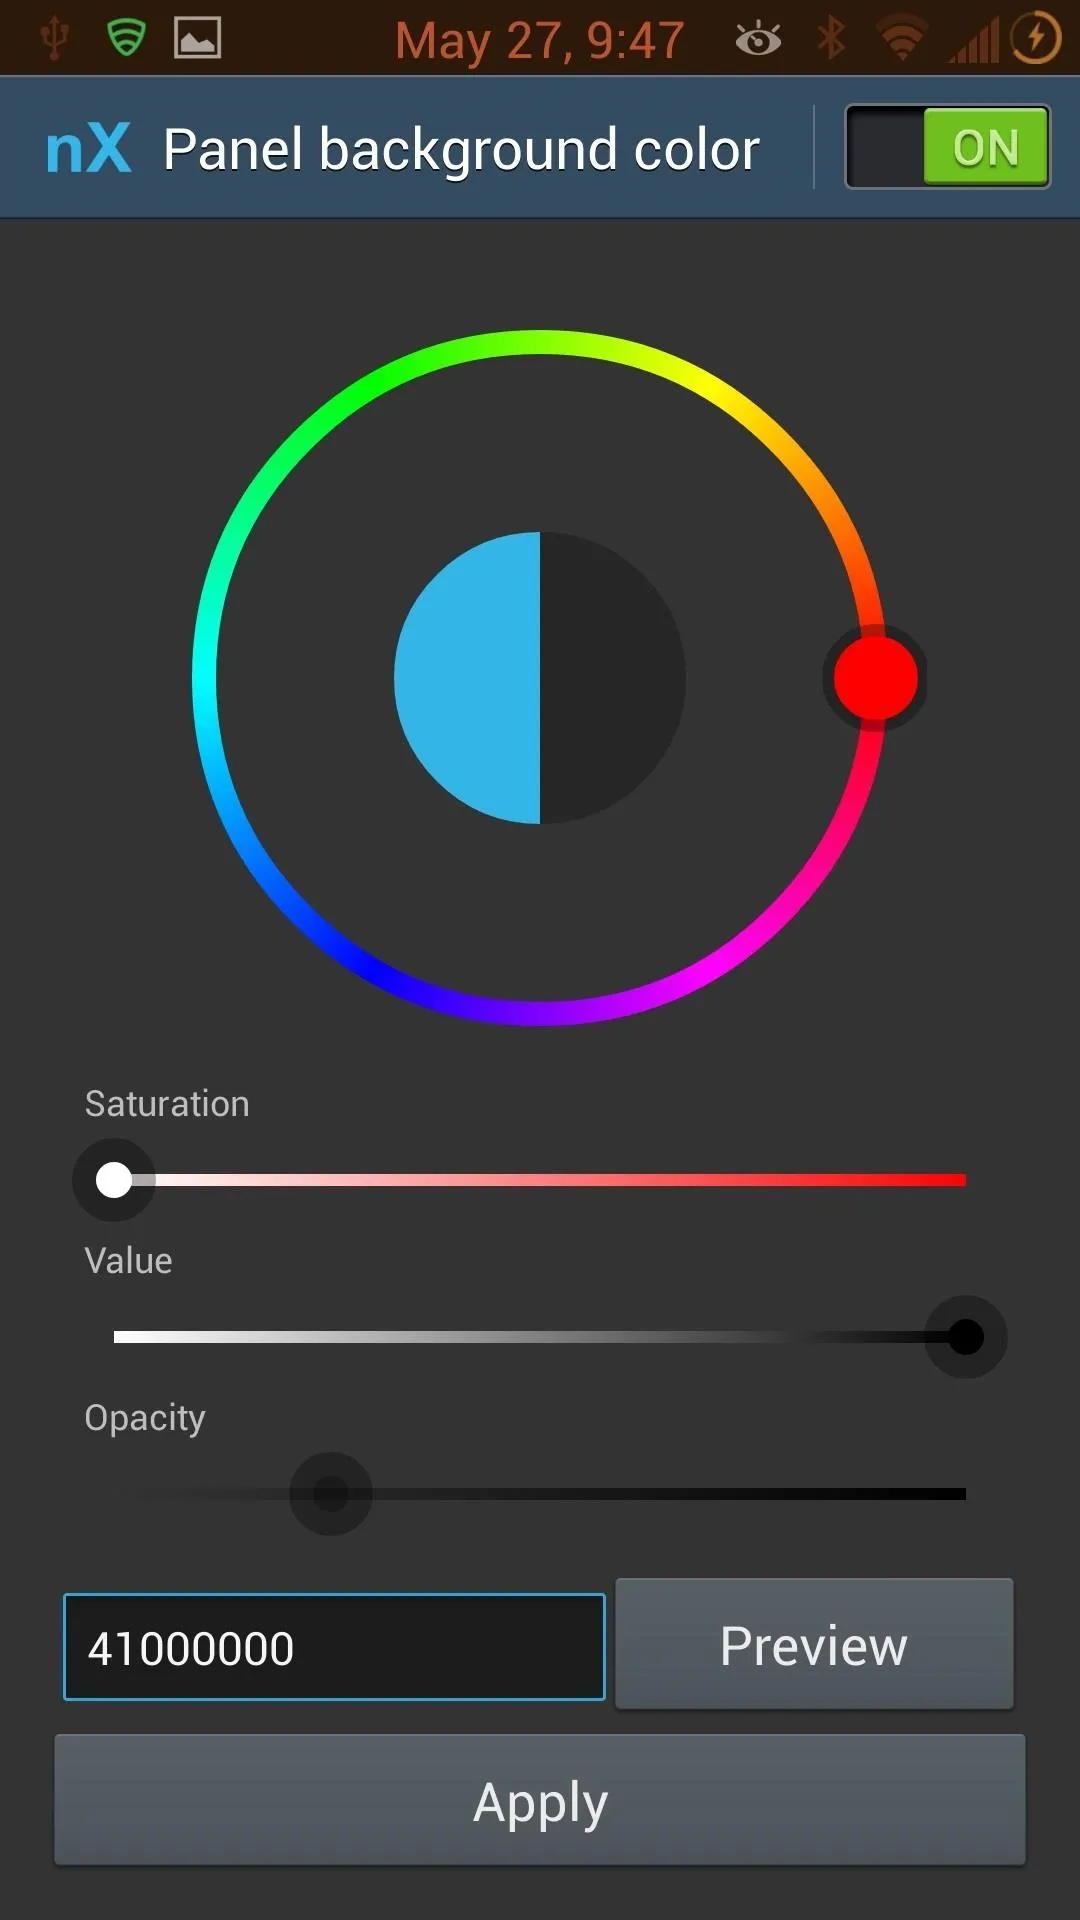
First, remember to turn it "On." Then you can choose whatever combination you want, but I like mine black transparent. To achieve that look, just turn the "Saturation" all the way down, the "Value" all the way up, and the "Opacity" to your desired level of transparency. I don't like 100% transparent, so I have my level right around 30%. Play around with this. The options are endless.
Conclusion of Nattach Xposed
So those are some of my favorites, but they barely scratch the surface. You should also try the landscape lockscreen, disable tethering restrictions (if you haven't already), center your clock, and change colors for status bar icons.
Remember, not everything may work for your device, especially if it's not on AT&T. For example, the volume skip mod does not work for me on Sprint, but that's okay—this is live and in active development, and we're a part of it.
Take screenshots to show off your changes, and let us know your favorite mods and themes in the comments below or in the forums.
How to Delete Nattach Xposed
If for any reason you want to revert back, you can restore your nandroid, turn off the mods you activated, and flash this Xposed Disabler file in recovery mode. Or, simply open Xposed Installer and select "Uninstall" followed by "Clean up".
Cover background courtesy of Wallpaperswide



Comments
No Comments Exist
Be the first, drop a comment!